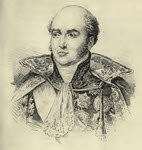
General Henri Gratian,
Count Bertrand,
1773-1844
|
|
The battle of Znaim (10-11 July 1809) was the last battle on the main front of the Franco-Austrian War of 1809, and was cut short after Napoleon agreed to Austrian offers of an armistice.
In the immediate aftermath of the battle of Wagram (5-6 July 1809) Napoleon lost contact with the retreating Austrian army. There were three possible routes that they could have been retreating along - west to Horn and then Prague, north-west along the highway to Znaim then Iglau or north along the road to Brünn. The aim in each case was the same - to reach comparative safety in Bohemia, and make it difficult for Napoleon to pursue without risking being cut off from his lines of communication.
In fact the bulk of the Austrian army was moving along the road to Znaim (I, III, V, VI and the Reserve). II and IV Corps were moving along more minor roads to the east. The area they were moving through was hilly, and was intersected by a number of rivers running across their line of march. The most significant of these would be the Thaya, which zigzagged from west to east across the landscape. After reaching Znaim from the south-west, the Thaya then turns south-east to flow towards Laa, before turning north-east to flow to the main highway to Brünn, before finally turning south-east and flowing into the March, which then heads south into the Danube. The Thaya would play a part in both the fighting at Znaim itself, and in the action on the day before the battle.
In order to locate the retreating Austrians Napoleon dispatched large forces along two of the possible routes. Massena was given the task of exploring the Znaim road, while Marmont and Davout were sent up the highway to Brünn. These last two columns soon went their separate ways, with Davout continuing along the highway while Marmont branched off to the left on the road towards Laa.
The French made firm contact with the Austrians on both the Znaim and Laa roads on 9 July. At the end of 8 July Rosenberg's IV Corps had taken up a position at Laa, guarding the left flank of the retreating army, but the Archduke Charles disagreed with this and ordered Rosenberg to move north-east to guard the road to Brünn. A small replacement force from the main army would take over the guarding duties at Laa. On 9 July Marmont arrived while this movement was underway (combat of Laa). Rosenberg was able to make his escape, covered by Radetzky's cavalry. While Marmont crossed the Thaya the small relief force managed to escape north-west back towards Znaim. Marmont misinterpreted what he was seeing and reported that Rosenberg's corps was moving towards Znaim. Although this was a mistake, Marmont had correctly identified the location of the main Austrian army. On the main road to Znaim Massena made slower progress. On 9 July he was held up by the Austrian rearguard at Hollabrunn, and on 10 July by fresh Austrian troops around Schöngrabern. Although progress here was slow, it did at least confirm the location of the main Austrian army.
Znaim is now in the Czech Republic, and the place names in use at the time of the battle have been changed. Znaim is now Znojmo. Two villages to the east of the town were to play a major part in the fighting. Klein-Tesswitz, on the north bank of the Thaya, is now Dobsice. Just to the east of this village a stream called the Leschna (modern Leska) joins the Thaya, after flowing through its own awkward ravine. A little up this stream is the village of Zuckerhandel (modern Suchohrdly). The main road being used by the French forces approaching from Laa followed the north bank of the Thaya, crossing the Leschna just outside Klein-Tesswitz, and joining the main highway south of Znaim. This main road crossed the Thaya on a stone bridge south of Znaim, then turned to the north-west on the far side of the town. This road was the only possible route for the Austrian baggage train. In July 1809 the Thaya was fordable along most of its length to the south and east of Znaim.
The French came very close to trapping Charles south of the Thaya. The first Austrian troops, Uhlan cavalry, crossed the Thaya south of Znaim on the morning of 10 July, and soon found French cavalry scouts approaching from the east. Luckily for the Austrians their Grenadiers and the Reserve Cavalry were close at hand. Charles posted one brigade of Grenadiers on the eastern bank of the Leschna, a second brigade on the west bank and a third in reserve. The fourth Grenadier brigade remained on the south bank of the Thaya. The cavalry was split in the same way, with units on both banks of the Thaya.
Marmont arrived on the scene between 10 and 11am. His command consisted of his own Army of Dalmatia, with around 7,000 infantry and 200 cavalry, the 2nd Bavarian Division (originally commanded by Wrede, but now under Minucci), with a strength of around 4,500 infantry and 800 cavalry, and finally Montbrun's light cavalry division, with at most 4,000 men. This gave him a total force or around 11,500 infantry and 5000 cavalry.
Just as on 9 July Marmont now misjudged the situation. Believing that he only faced the Austrian rearguard he ordered a full scale assault on their position, hoping to get behind them. Montbrun was posted on the far right, with orders to reach the main road north of Znaim. Claparède's division was next in line, with Minucci's Bavarian division attacking close to the Thaya.
The French infantry attacks were successful. The Austrian Grenadiers were forced back and Delzons' brigade from Claparède's division advanced towards Zuckerhandel while Beckers's Bavarian brigade attacked Tesswitz. On the right Delzons took Zuckerhandel, and continued on to the north-west, briefly threatening to take the heights to the west of Kukrowitz, the next village in line. On the French left the Bavarians took Tesswitz after a two hour battle in the village.
Montbrun's men were initially successful, forcing aside the Uhlans at the left of the Austrian line, but they soon ran into stronger Austrian forces and were forced to halt. Even so they still held a position to the north of Znaim, and were a potential threat to the Austrian line of retreat.
While this was going on the main Austrian army was finally arriving on the scene. Hohenzollern's II Corps arrived first, and was placed south of the Thaya. Bellegarde's I Corps was next. He used fords to cross the river, then sent one brigade towards Tesswitz while the rest of his corps moved north, blocking Delzons's advance. Tesswitz briefly returned to Austrian hands, before the Bavarians retook the village. III Corps was placed at the left of the Austrian line, while Klenau's VI Corps was placed in reserve to the north-west of Znaim.
The fighting for Tesswitz continued for the rest of the day. The village changed hands repeatedly, but at the end of the day the village was still in French hands. The Bavarian division was so badly mauled that it had to be withdrawn from the line and the village was held overnight by the 79th and 81st Ligne, Bertrand's brigade from Claparède's division.
At the end of the day Marmont was in a rather dangerous position, facing a much larger Austrian army and with any significant reinforcements some way distant. Luckily for him, Archduke Charles was no longer in the mood to fight. Instead he tried to arrange a local armistice, on the grounds that a peace envoy had already left to find Napoleon (see below).
Overnight the Austrians reorganised their lines. The last troops south of the Thaya were moved across the river. V Corps (Reuss) was given the job of defending the bridge over the Thaya. The bridge was left intact, partly because the French arrived before it could be destroyed. Bellegarde's I Corps was next in line, guarding the line of the Leschna stream against any move by Marmont. III Corps and the Cavalry Reserve made up the left of the line, to guard against any attempt to outflank the army and cut the crucial road north-west. II Corps was in reserve behind III Corps, while VI Corps was sent up the road to Wolframitzkirchen.
The French received two reinforcements early on 11 July. First to arrive on the scene was Massena with the troops that had been held up by the Austrian rearguard actions on the main road to Znaim. His light cavalry arrived first, around 6am, forcing the Austrians to pull back their last detachments south of the Thaya. Between 9 and 10am the first of Massena's infantry, 5,000 men under Legrand, reached the scene.
After a brief reconnaissance Massena decided to try and fight his way across the river. Although Legrand was outnumbered by Reuss, he did have one big advantage. The Austrian positions were exposed to artillery fire both from Marmont's men to the east and from the opposite bank of the Thaya, which flowed alongside their position, before turning to the east to flow under the bridge. French gunners on the west bank of the river were thus able to hit Reuss's men from the side. Legrand's skirmishers were able to wade across the river supported by artillery fire from both flanks, capturing the bridge intact. Legrand's infantry then crossed the bridge and began to push back Reuss.
Much of this fighting had been watched by Napoleon, who joined Marmont at about 10am. Napoleon realised that he was not yet strong enough to take on the entire Austrian army, and so he decided to try and pin them in place during 11 July to give Oudinot and Davout time to reach the battlefield. The decisive battle would take place on 12 July. Napoleon ordered Marmont to make a series of attacks along his front, none of which achieved anything significant, but they did prevent Charles from either disengaging or overwhelming Massena.
Massena's men continued to advance steadily. The monastery at Klosterbruck and the village of Alt Schallersdorf both fell to them, and the French were approaching the southern edge of Znaim.
The most dramatic incident of the battle now took place. Charles ordered a battalion of Hungarian Grenadiers to attack the advancing French skirmishers. At about the same time the French line came under fire from two of its own guns. This was followed by a sudden and very intense thunderstorm. Most men on the battlefield were distracted by this natural intervention, but the Hungarian Grenadiers were an exception. Led by Oberstleutnant August Graf zu Leiningen-Westerburg they charged the disorganised French lines, driving them back with their bayonets (muskets now being useless in the very heavy rain). Legrand's men broke and fled back towards the bridge, threatening to undo all of their good work earlier in the day. The situation was saved by Massena, who ordered the 10th Cuirassiers across the bridge to attack the Grenadiers. It was now their turn to be scattered, suffering 323 casualties in a very short time.
With the situation on their left restored, the French were able to return to the attack. Legrand and Carra Saint-Cyr on the left and Marmont on the right were now able to make steady progress, and by 7pm they were approaching the outskirts of Znaim. At this point the battle came to a sudden and unexpected end. French and Austrian staff officers rode up and down the lines announcing a cease fire. Austrian offers of an armistice had finally been accepted.
Armistice negotiations had been underway for some time. On 8 July the Emperor Francis decided to send General Johann, Fürst von Liechtenstein as a peace envoy to Napoleon. Early on 10 July news reached the Austrians at Znaim that Napoleon had accepted Liechtenstein's appointment. He turned over command of his troops to Schwarzenberg, and headed south towards Stockerau, where the main road south from Znaim reached the Danube. Liechtenstein's journey would be largely pointless, and he only reached Napoleon's camp on the night of 11-12 July.
At the end of 10 July Charles tried to arrange a local armistice with Marmont, using Liechtenstein's mission to justify it, but this offer was refused. On the afternoon of 11 July Napoleon decided to accept this offer. The staff officers were sent out to bring the battle to an end, and negotiations began between Berthier and Wimpffen to arrange a one-month long armistice. It was at this stage that Liechtenstein appeared. Charles accepted the armistice agreed by Wimpffen, and the military phase of the war came to an end.
 1809 Thunder on the Danube: Napoleon's Defeat of the Habsburgs, Volume III: Wagram and Znaim, John H. Gill. The third part of a very impressive narrative history of the War of the Fifth Coalition, looking at the final battles at Wagram and Znaim and the subsidiary campaigns in Poland, Hungary, Dalmatia, Styria and the Tyrol. Manages to be both very detailed and readable and coherent, a very impressive achievement. [read full review]