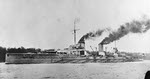
SMS Von der Tann
soon after completion
|
|
The German raid on the Yorkshire coast of 15-16 December 1914 saw the first civilian casualties on British soil since the French Revolutionary Wars. It was the product of a failure of the German naval strategy at the start of the First World War. This had relied on the British coming into German home waters where they would have been vulnerable to attack by submarines. Meanwhile the High Seas Fleet would avoid taking risks that might expose the north German coast to invasion. Indeed, on 28 August 1914 elements of the British fleet had done just that (battle of Heligoland Bight), but the resulting battle had seen the Germans lose four ships without sinking a single British ship.
Admiral Friedrich von Ingenohl, the commander-in-chief of the High Seas Fleet, argued in favour of a more aggressive strategy, but he had to overcome resistance from the Kaiser, who ordered him not to take the High Seas Fleet to sea without his express permission. The battle of Coronel gave him his chance. The British were forced to dispatch three battlecruisers to find von Spee’s squadron, reducing the margin by which the Germans were outnumbered in the North Sea. A raid on Yarmouth on 3 November 1914 passed without incident, and Ingenohl began to plan for a more ambitious raid.
The Yorkshire coast was chosen as the target for the raid. It fell between the two nearest naval bases, on the Tyne and the Humber. In the early months of the war the Germans had laid minefields off both of those rivers, leaving a gap opposite Scarborough. The area was also due west of the German naval bases on the Elbe and the Jade. However, compared to Great Yarmouth the Yorkshire coast was much nearer the Grand Fleet’s Scottish bases. If secrecy was not observed there was a real danger that the British might catch the German raiding force. Accordingly, Ingenohl decided to take the High Seas Fleet out, to protect the battlecruisers if the British appeared.
In Britain the key concern was that the Germans might mount a small scale invasion of the east coast. The Navy had guaranteed to stop any invasion of over 70,000 men, but smaller forces would need less time to prepare and to cross the North Sea. The Army needed two regular divisions to guard against such a raid, but the regulars were all now in France. The navy was forced to distribute the Grand Fleet along the east coast, with a battle squadron at Rosyth, ships on the Tyne, the Humber and in the Wash, and a squadron of pre-Dreadnaught battleships at Sheerness (eventually to be joined by the Dreadnaught herself). It was believed that a small force would be able to inflict some damage on the German fleet if it came out, allowing the Grand Fleet to reach the scene. Coronel and the Falklands suggested that this was no longer the case, and that all the weaker forces on the east coast would actually do was provide the German battleships with target practice.
The British had a massive advantage in December 1914. Room 40 of Naval Intelligence had just broken the German naval codes, and gave the Admiralty advance warning of the raid. The British squadrons despatched to deal with the raid were already well out to sea by the time the Germans began to cross the North Sea. The only weakness in the British position was that they did not know that the battleships of the High Seas Fleet were involved in the raid.
The raid falls into three separate phases. In the first, the German High Seas Fleet and the squadrons came close to a confrontation, before the Germans turned back. In the second the German battlecruisers reached the east coast, bombarded Scarborough, Hartlepool and Whitby, and then turned to make their escape. In the third the British squadrons came close to catching the German battlecruisers, but a combination of bad luck, poor signals and the low visibility helped the Germans escape.
The first phase of the raid began on 15 December. At noon that day the British 2nd Battle Squadron and the Battlecruisers met off the Scottish coast, and began their journey south. Later that afternoon the German High Seas Fleet made its first general rendezvous and began its journey west.
The German raiding force took the lead. Admiral Hipper had command of the 1st Scouting Squadron (the battlecruisers Seydlitz, Moltke, Von der Tann and Derfflinger and the cruiser Blücher.) and the 2nd Scouting Squadron, consisting of light cruisers. The main battlefleet, under Admiral von Ingenohl, followed on at a distance, aiming for a position south east of Dogger Bank from where they could defend the retreating striking force, or pounce on isolated elements of the Grand Fleet. The cruisers Prinz Heinrich and Roon sailed ahead of the main High Seas Fleet as a screen.
The British fleet was commanded by Admiral Warrender, commander of the Second Battle Squadron (the battleships King George V, Ajax, Centurion, Orion, Monarch and Conqueror and the cruiser Boadicea). The Battlecruisers were commandeered by Admiral Beatty, from his flagship HMS Lion. At 3 pm on 15 December they were joined by the Third Cruiser Squadron from Rosyth. The British fleet was accompanied by seven destroyers, used to screen the left hand side of the main fleet. The British intended to take up a position south of Dogger Bank, and close to the German High Seas Fleet.
The first contact between the two fleets was made at 5.20 a.m. by the destroyers, and a battle developed. This is the moment sometimes seen as German’s lost chance for a major naval victory. Six British battleships and four battlecruisers were within striking distance of the entire High Seas Fleet. Ingenohl was later much criticised for what he did next, but in reality he had little choice. Both Ingenohl and Warrender assumed that the destroyers were screening larger forces. Ingenohl had no way to know that the entire Grand Fleet wasn’t about to appear out of the mist, and so at 5.45 a.m. he ordered the High Seas Fleet back to port. Even if the two forces had come into sight of each other, the British squadrons were faster than the High Seas Fleet. Beatty would hardly have stood and fought the entire German fleet, and so a chase would have developed. A clash between the fastest German battleships and the British battleships and battlecruisers is perhaps the best that could be expected.
The glancing blow with the High Seas Fleet did divert the British from their main job, to guard to gap in the German minefield off Whitby. Instead, they indulged in a pursuit of the German cruiser Roon, which continued until 9 a.m., but which time the German striking force had already left the east coast. Despite this diversion, by 11 a.m. on 16 December the British squadrons were back in place.
Meanwhile, Admiral Hipper’s striking force had passed through the gap in the minefields. Heavy seas forced his light cruisers to turn back, an apparent misfortune that would greatly assist the Germans escape a few hours later. At 8 a.m. German battlecruisers appeared off Hartlepool and Scarborough and began a short bombardment. Only at Hartlepool did they encounter any resistance, from three 6in guns ashore and from a small force of four destroyers, two cruisers and a submarine at sea. The force that attacked Scarborough then turned north to raid Whitby, before all six ships involved turned back east.
We now reach the third phase of the raid. At 11.00 a.m. Admiral Hipper, with his four battlecruisers, was at the western entrance to the gap in the minefield. At the far end of the gap was the south west corner of Dogger Bank, so Hipper had a choice of northern or southern routes. As Hipper entered the safe passage, Warrender was heading to block the southern route and Beatty the northern.
At 11.25 Beatty’s cruisers, north of his battlecruisers, found the German light cruisers, heading east well ahead of Hipper. The cruisers attempted to engage with the German cruisers. Beatty attempted to signal to two of the four cruisers that they should resume their scouting duties, but the signal was badly directed and the entire cruiser squadron broke off the engagement. The German light cruisers responded by turning south.
At noon, Hipper had reached the middle of the safe channel. Warrender and Beatty were now in the correct place to intercept him. Once again the German light cruisers intervened. At 12.15 Warrender sighted them through the mist, and turned north east in an attempt to intercept, once again assuming that the battlecruisers must be close. At the same time Hipper turned to the south east, in an attempt to draw the British away from the vulnerable cruisers.
When Beatty received this news from Warrender he made the same assumption, and at 12.30 p.m. turned east, thinking that he might have gone too far west and let the Germans get past him. This was the crucial moment in the hunt for Hipper.
At 12.40 Warrender lost the Germans in the mist, and turned back to the west. A gap had now opened to the north, and at 12.45 p.m. Hipper turned north, in the knowledge that the dangerous British battleships were guarding the southern passage.
Once Beatty learnt of Warrender’s move, he turned north (1.15 p.m.), on the correct assumption that Hipper would have done the same. At this point Hipper and Beatty were both sailing north, were roughly level with each other, and were on converging courses. If Beatty had continued on the same course, then he would have had a good chance of catching Hipper, although a direct clash between the two groups of four battlecruisers was not what the British wanted. Warrender did not turn north until 1.24 p.m., by which point Hipper was 20 miles to his north west, and heading north.
At 1.43 p.m. Beatty had a piece of bad luck. He received a signal from the shore reporting the course of the German battlecruisers as it had been between 12.15 and 12.45, when they were heading south east. If they had maintained this course, then they may well have already passed to his south. Beatty had no choice but to turn east, in an attempt to get between the German battlecruisers and their base. By 2.30 p.m. Beatty was east of the dangerous patch of Dogger Bank, and sailing East-South East. At this point Hipper was a safe distance to the north east of Beatty, with the two squadrons on battlecruisers slowly getting further apart.
The British continued to search for Hipper until 3.47 p.m., at which point Warrender called off the search. Once again misinformation played a part in this decision. At 1.50pm the Admiralty learnt that the German High Seas Fleet was at sea, seventy miles north west of Heligoland. Not having known that they had been out all day, the Admiralty assumed that the High Seas Fleet was coming out to sea to attack the British squadrons, when in fact they were sailing back to base. The entire Grand Fleet was already at sea. Now it came south hoping to find the High Seas Fleet. When it became obvious that the Germans were not present, the entire Grand Fleet came together, carried out some tactical exercises, then headed back to Scotland.
Hipper’s squadron had one more hurdle to cross before it could reach safety. Commodore R. J. B. Keyes had managed to gather together a force of four submarines, and by the early morning of 17 December they were off the German coast, in a line running north from the Weser River. That morning E 11 had a chance to fire a torpedo at Hipper’s ships, but missed, and was then forced to dive to avoid being rammed. The dive affected the submarines balance, and when her commander attempted to come back to attack height he broke the surface. The German squadron scattered, and made it to safety.
Despite the success of the raid itself, not all German opinion was happy. Admiral von Tirpitz felt that Ingenohl had had the chance to inflict a war-winning blow against the Grand Fleet. Scheer was a little less over the top, but even he felt that Ingenohl had thrown away a chance of a major triumph. Both Tirpitz and Scheer forgot that Ingenohl was under strict instructions not to engage with a superior force. On the morning of 16 December he had had no way to know what force he was facing in the mist, and so he had little or no choice other than to turn back. At the time Ingenohl was actually strengthened in his desire to conduct more offensive operations, a result which led to the battle of Dogger Bank (24 January 1915).
In Britain anger was directly towards the Germans, for their breach of the rules of war in bombarding an undefended port, and to a certain extent towards the Navy that had let them get away with it. Fortunately the public did not know that the fleet had had advance warning of the German raid. The ease with which the Germans had reached the east coast did nothing to dispel concerns about a small scale invasion. As a result Beatty’s battlecruisers moved from Cromarty to Rosyth, a move that halved the distance they would have to travel to reach the Yorkshire coast.
The raid is sometimes described as the first attack on British soil since the Dutch attacked Sheerness in 1667, but this was not the case. It was not even the first attack on British soil of the First World War – that honour goes to the raid on Yarmouth of 3 November 1914, which caused no casualties. The most recent direct attack on Britain had been the French attack on Fishguard in 1797, repelled by the local militia. That attack had also seen civilian casualties, but no British soldiers had been killed. Nevertheless, the German raids on the British coast in 1914 did come as a real shock to a population that had been expected the war to begin with a “super-Trafalgar” – a massive clash between Dreadnaughts that would justify the expensive investment in the pre-war navy.
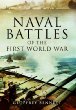 Naval Battles of the First World War, Geoffrey Bennett .
Although this was first published in the 1960s it is still a good account of the major surface clashes of the First World War, looking at the early clashes in the world's oceans and the series of battles in the North Sea, ending with Jutland. The final part of the book looks at the U-boat war, although not in as much detail as the earlier surface sections. [read full review]
Naval Battles of the First World War, Geoffrey Bennett .
Although this was first published in the 1960s it is still a good account of the major surface clashes of the First World War, looking at the early clashes in the world's oceans and the series of battles in the North Sea, ending with Jutland. The final part of the book looks at the U-boat war, although not in as much detail as the earlier surface sections. [read full review]
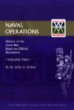 Official History of the War, Naval Operations Vol. II, Sir Julian Corbett. Volume two of five in the British Official History of the First World War at sea covers the naval attack on the Dardanelles and early months of the Gallipoli campaign. On the home front it includes the German raid on the Yorkshire coast of December 1914 and the battle of Dogger Bank [see more]