|
|
|
|
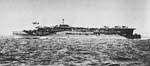
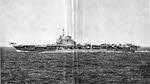
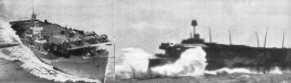 Aircraft Carriers (collection)
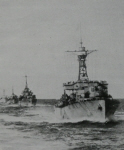
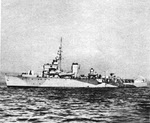
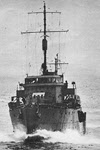
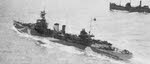
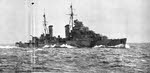
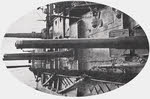
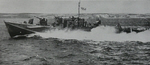
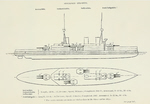
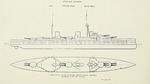
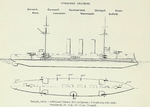
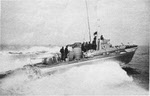
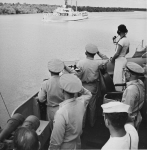
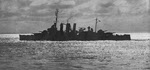
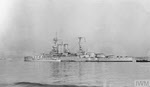
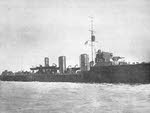
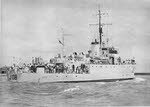
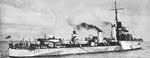
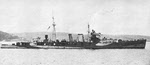
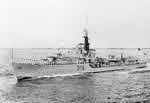
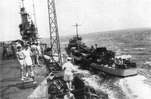
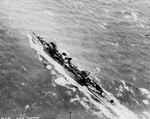
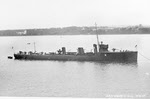
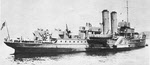
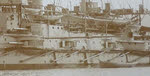
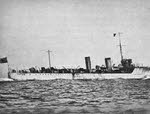
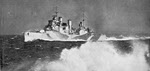
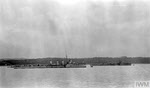
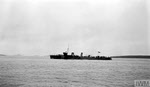
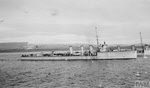
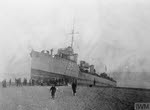
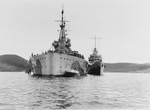
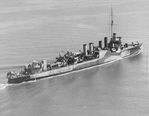
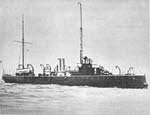
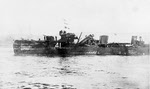
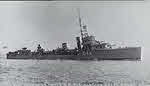
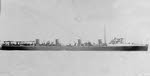
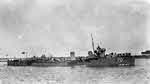
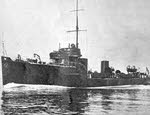
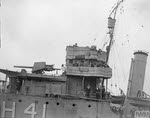
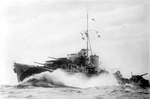
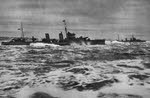 A to I class destroyer flotilla leader
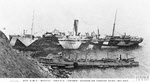
 Derna,
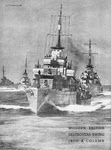
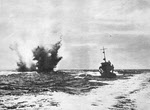
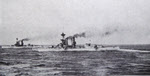
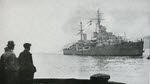
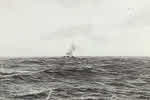
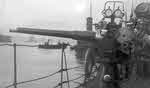
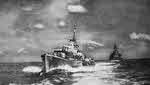
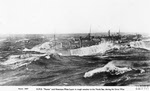
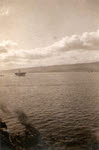
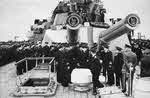
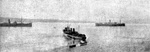
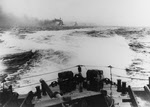
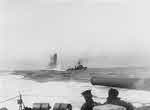
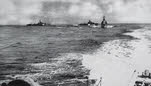
British Cruisers bombarding
Derna,
British Cruisers bombarding
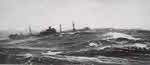
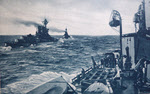
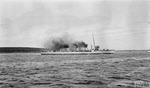
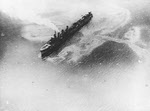
 Malta: British Cruisers make smoke during Malta Convoy
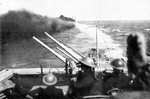
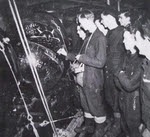
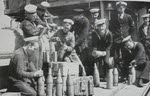
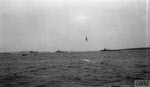
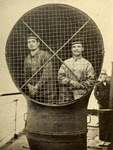
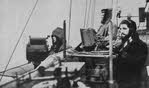 Naval Spotters training to spot fall of shell
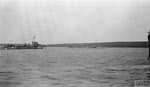
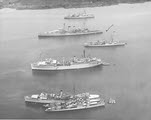
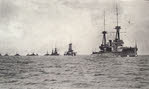
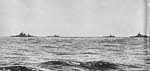
 British Eastern Fleet off Sabang, April 1944
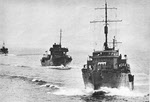
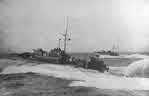
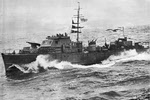
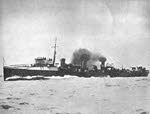
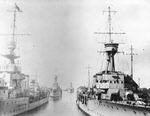
 War Emergency Destroyers in Column
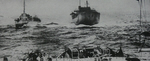
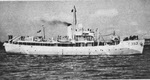
 Merchant Ship on Russian Convoy Duty
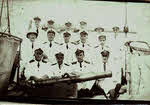
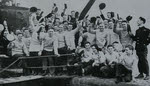
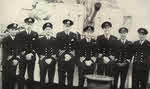 Captains of Captain Class Frigates
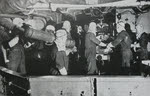
 Crews of Captain Class Frigates
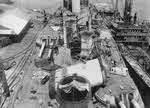
 Fire at the Plymouth Submarine Yard, Spring 1944
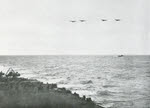
![]() Fairey Swordfish over Convoy RA 57
Fairey Swordfish over Convoy RA 57
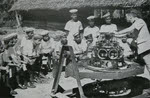 Teaching Engine Design, Ceylon
![]() Air Strike for Operation Goodwood (Naval)
Air Strike for Operation Goodwood (Naval)
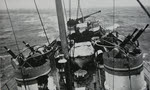
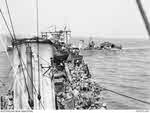
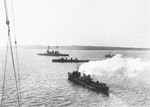
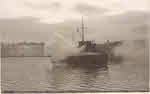
![]() Convoy Escorts laying smoke in the Channel
Convoy Escorts laying smoke in the Channel
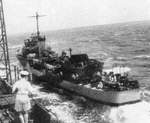
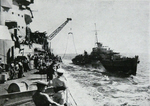
 Warship refuels in mid-Atlantic
 2nd Escort Group, c. June-September 1944
 Motor Launch ML542 on the Rhine at Cologne
 British Nurses visit Rhine Naval Patrol
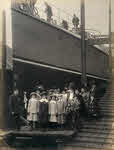
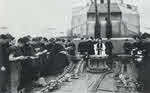
 Five Ocean Class Cargo Ships being launched
 Merchant Seaman rescued from African Coast
 Merchant Seaman Rescued from Atlantic
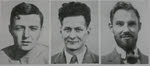 Chariot crew Dove, Ferrier and Greenland
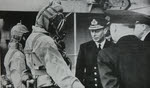
 Adjusting Oxygen Supply on Diving Suit
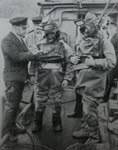
 George VI inspects British Divers
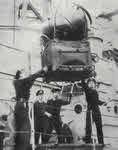
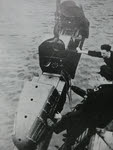 Chariot Mk.I being lowered into the water
 Four British Submarines by Depot Ship, c.1944
 Loading a Torpedo into a British Submarine
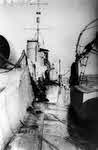
 Control Room in a British Submarine
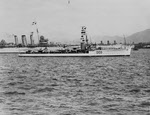
 Algerine Class Minesweeper from the left
 Arethusa Class Cruiser bombarding Libyan Coast
![]() Arethusa Class Cruisers off Iceland
Arethusa Class Cruisers off Iceland
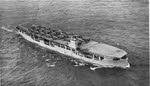
 Attacker class escort carrier with lifts down
 Bangor Class Minesweepers and HMCS La Malbaie
 Bangor Class Minesweeper in St. Lawrence River
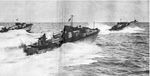 Formation of British Power Boat 70ft Motor Gun Boats
 British Power Boat Co Type Two 63
 Two British Power Boat 72ft MTBs
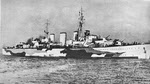
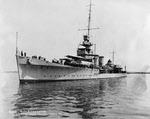
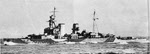
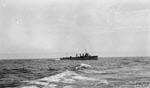
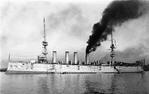
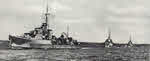
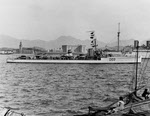
 C Class Cruiser during Second World War
 Caledon Class Cruiser from the Left
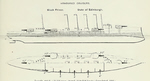
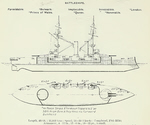
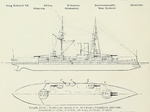
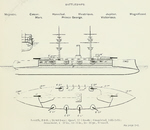
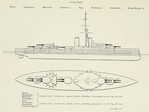
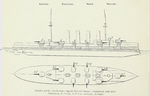
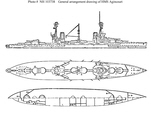
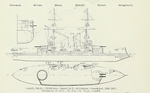 Plans of Canopus Class Battleships
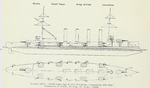
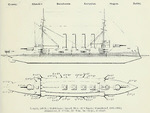 Plans of Cressy Class First Class Armoured Cruisers
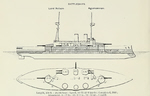
 Plans of Devonshire Class First Class Armoured Cruisers
 Dido Class Cruiser bombarding Libyan Coast
 Plans of Drake Class First Class Armoured Cruisers
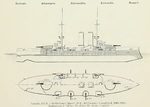
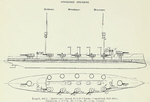
 Plans of Duke of Edinburgh Class First Class Armoured Cruisers
 Plans of Duncan Class Battleships
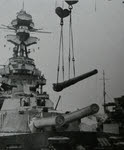
 Side guns on Edward VII Class pre-dreadnought battleship
 Fairmile B Motor Launch drops Depth Charge
 Fairmile C Motor Gun Boat from the left
 Rear guns on Fairmile C Motor Gun Boat
 Fairmile D Motor Torpedo Boat at sea
![]() Fiji Class Cruiser firing broadside
Fiji Class Cruiser firing broadside
 Flower Class Corvette from the right
 Flower Class Corvette under Construction in Canada
 Plans of Formidable and London Class Battleships
 Illustrious class carrier from above
 Insect class gunboat firing her guns on the Tigris
 Plans of Invincible Class Battlecruisers
 Plans of King Edward VII Class Battleships
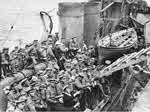
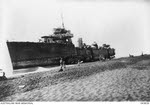
 LCT Mk 4 carrying troops to Normandy
 Leander Class Cruiser from Above
 Plans of Lion Class Battlecruisers
 Plans of Lord Nelson Class Battleship
 Plans of Majestic Class Battleships
 Plans of Minotaur Class First Class Armoured Cruisers
 Plans of Monmouth Class First Class Armoured Cruisers
 Plans of Orion Class Battleships
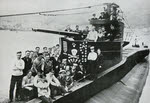
 Officers of S-Class Submarine on Gun Platform
 Plans of Swiftsure Class Battleships
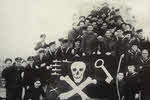
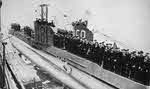
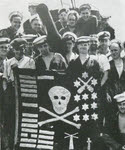
 Crew of T-Class Submarine under Jolly Roger, Alexandria, 7 November 1942
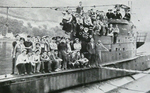
 Crew of T-Class Submarine coming ashore, Alexandria, 7 November 1942
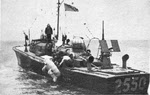
 Vospers 72ft 6in MTB in Chesapeake Bay
 Plans of Warrior Class First Class Armoured Cruisers
A |
B |
C |
D |
E |
F |
G |
H |
I |
J |
K |
L |
M |
N |
O |
P |
Q |
R |
S |
T |
U |
V |
W |
X |
Y |
Z |
 HMS Abdiel in the Firth of Forth
 HMS Abdiel (M39) from the right
![]() HMNZS Achilles after 1943-44 refit
HMNZS Achilles after 1943-44 refit
 MV Acavus with deck cargo of aircraft
 Plans of HMS Agincourt c.1914-16
 HMS Agincourt and HMS Erin at Scapa Flow, 1918
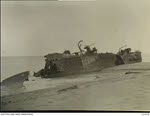
 HMS Albacore after hitting a mine
 HMS Albatross during the First World War
 HMS Albatross in Mediterranean Colours
 USS Caperton (DD-650) saluting HMS Alert and Admiral Lambe
 HMS Amazon during the First World War
 'A' Class destroyer HMS Antelope
 Parker Class Destroyer HMS Anzac
 HMS Napier and Anzac, Gutter Sound after oiling
 Writing messages on mines on HMS Apollo
![]() HMS Argus : converted in 1918
HMS Argus : converted in 1918
![]() Ark Royal, HMS : first carrier with that name, 1914-1934 (when renamed)
Ark Royal, HMS : first carrier with that name, 1914-1934 (when renamed)
 HMS Attacker and HMS Christopher helping HMS Dunraven, 1917
![]() Superfiring turrets on HMS Audacious
Superfiring turrets on HMS Audacious
![]() Audacious - superfiring turrets
Audacious - superfiring turrets
![]() Audacity, HMS : escort carrier converted in 1941
Audacity, HMS : escort carrier converted in 1941
 HMAS Australia before being scuttled, 1924
 HMAS Australia (D84) from the left
 HMS Barham and HMS Radstock, 1917
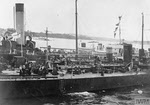
 HMS Basilisk, Malta, c.1913-1918
 'G' Class Destroyer HMS Basilisk
 Side view of minesweeper HMCS Bayfield
 Australian Troops on HMS Beagle, Gallipoli
 Russia Convoy seen from HMS Bellona
 Captain C.F.W. Norris of HMS Bellona, 1944
 HMS Benbow and HMS Marlborough
 HMS Emperor of India and HMS Benbow from HMS Agincourt
 Commander D.G.F.W MacIntyre on bridge of HMS Bickerton
 HMS Birmingham at Copenhagen, 1945
![]() HMS Black Prince, Ship's Badge of
HMS Black Prince, Ship's Badge of
 HMS Black Prince after Normandy bombardments
 HMS Botha leaving Scapa Flow, 1917
 HMAS Boudica at Scapa Flow, 1917
 L.S.Rawles on bridge of HMS Broke
 Thornycroft Type Destroyer Leader HMS Broke
 'C' Class Destroyer HMS Bullfinch
 HMS Bullfinch at Brighton, 1905
 HMS Calcutta at Philadelphia, 1921
 HMS Capetown before 1933 refit
 HMS Capetown from above and the left
 HMS Caprice with Japanese commander of Bintan Island
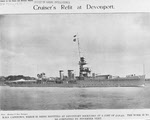
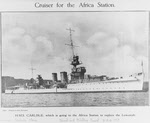 HMS Carlisle before moving to Africa Station, 1929
 AMC Carnarvon Castle from the left
 HMS Chiddingfold from the left
HMS Attacker and HMS Christopher helping HMS Dunraven, 1917
 HMS Cockade at Singapore, 1956
 HMS Columbo as an anti-aicraft cruiser
 HMS Colombo being launched, 1918
 HMS Comus, Scapa Flow, June 1917
 HMS Conn after patrol, April 1945
 HMS Consort at Singapore, 1956
![]() HMS Cumberland: Type 22 Frigate
HMS Cumberland: Type 22 Frigate
 HMS Curacoa, Cambrian, Canterbury and Comus, 1919
 HMS Defender sinking off Sidi Barrani, 1941
 HMS Derwent, Hunt Class Type 3 destroyer
 HMS Derwent seen from HMS Illustrious
 HMS Despatch at high speed, 1942
 Dido Class Cruiser from the right
 HMS Diomede in the Panama Canal
 HMS Diomede in the Panama Canal
 HMS Duke of York in heavy seas
 HMS Duke of York firing her main guns
HMS Attacker and HMS Christopher helping HMS Dunraven, 1917
 Triple torpodo tubes on HMS Durban
 HMS Durban about to serve in China
![]() Eagle, HMS : August 1942, just before being sunk guarding a Malta convoy
Eagle, HMS : August 1942, just before being sunk guarding a Malta convoy
 HMS Edinburgh after use as target, 1908
HMS Emperor of India and HMS Benbow from HMS Agincourt
 HMS Glasgow and HMS Enterprise at Singapore, 1942
HMS Agincourt and HMS Erin at Scapa Flow, 1918
 HMS Exeter, 1934, Panama Canal Zone
 HMS Exeter and US Destroyers, 1934, Panama
 HMS Farne (T353) from the right
 HMS Flying Fish in Victorian Livery
 HMS Flying Fish from the right
 HMS Frobisher during the Second World War
![]() Furious, HMS : target of the first successful deck landing at sea, August 1917
Furious, HMS : target of the first successful deck landing at sea, August 1917
![]() Furious, HMS: off the Norwegian coast at Tronso
Furious, HMS: off the Norwegian coast at Tronso
 Aircraft taking off from HMS Furious
 HMS Garland off Netley, Hampshire
 HMS Garland in Polish Hands, c.1941-42
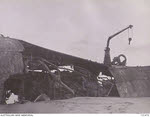
 HMS Gipsy being salvaged, 1943
![]() HMS Glasgow under fire off Normandy
HMS Glasgow under fire off Normandy
HMS Glasgow and HMS Enterprise at Singapore, 1942
 Anti-aircraft Cruiser HMS Glenmore
 HMS Glowworm during battle with the Hipper
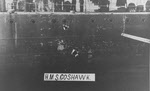 Damage caused to HMS Goshawk at Jutland
 HMS Grampus, Malta, c.1913-1918
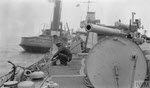
 Gunners on HMS Grenville fusing shells
 Launch party for HMS Greyhound
 USS Kalk (DD-170) as HMS Hamilton
 Twin 12cm mount being tested on HMS Hereward
 Crew on HMS Hero cleaing chains, 1942
 Crew on HMS Hero sharpening Cutlass blades, 1942
 HMS Holmes drops depth charge off Normandy
 HMS Hotspur at Sheerness, c.1939-40
 Boarding Parties return to HMS Hotspur, c.1943-45
 Crew of HMS Howe on 5.25in gun turrets
 HMS Hunter in drydock at Gibraltar, c.1937-38
 Breech of 4in Mark VIII Gun, HMAS Huon
 Firing a 12-pounder gun, HMAS Huon
 QF 12-pounder gun on HMAS Huon
 HMCS Huron (G24) from the left
![]() Illustrious, HMS: on fire on 10 January 1941 after being hit by heavy bombs
Illustrious, HMS: on fire on 10 January 1941 after being hit by heavy bombs
 HMSAS Imhoff enters Bengazi Harbour
 HMS Implacable (1898) at Anchor
 Bridge and main guns of HMS Implacable
 Casemate guns of HMS Implacable
 Painting of HMS Implacable on steam trials in 1904
 HMS Inconstant at a buoy, 1917
 HMS Indefatigable from the right
 HMS Indomitable under full steam
![]() Indomitable, HMS : Guarding a convoy to Malta, August 1942
Indomitable, HMS : Guarding a convoy to Malta, August 1942
![]() HMS Indomitable from the right
HMS Indomitable from the right
 'I' Class Destroyer HMS Intrepid
 HMS Ithuriel: snapshot taken from
 HMS Kempenfelt with flotilla of R Class Destroyers
 HMS King George V from the left
 Side view of HMS King George V
 HMS King George V from the right-rear
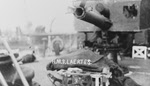 Damaged 4in gun on HMS Laertes
 HMS Lagan (K259) from the right
 HMCS La Malbaie from the front
Bangor Class Minesweepers and HMCS La Malbaie
 Pipelayer HMS Latimer during Operation PLUTO
 'L' Class destroyer HMS Laurel
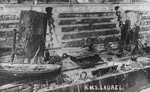 Damage suffered by HMS Laurel at Heligoland (1 of 2)
 Damage suffered by HMS Laurel at Heligoland (2 of 2)
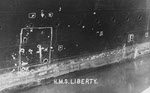 Damage to HMS Liberty at Heligoland
 HMS Lightfoot being towed into Drydock
 HMS London in the North Atlantic
 HMS Maenad after oiling, Gutter Sound, 1917
 M Class Destroyer HMS Mahratta
 RFA Maine and HMS Wallace at Constantinople
 6in gun crew on HMS Malaya at action stations
 HMS Marksman, Mindful & Mameluke going to oil, Gutter Sound, 1917
 Survivors from HMS Manchester return home
 HMS Manners relieving the Striking Force. 1917
 HMS Medea and HMS Mansfield at Plymouth
 HMS Mansfield in North Atlantic, 1943
 Loading a mine onto HMS Manxman
HMS Marksman, Mindful & Mameluke going to oil, Gutter Sound, 1917
 Bridge Platforms, HMS Marlborough
 'Coffee Boxes', HMS Marlborough
HMS Benbow and HMS Marlborough
 HMS Martial, Gutter Sound, 1917
 HMS Marvel and HMS Menace, Firth of Forth, 1917
 HMS Mastiff (D66) from the front
 HMS Mastiff (D66), Rosyth, 1919
HMS Medea and HMS Mansfield at Plymouth
HMS Marvel and HMS Menace, Firth of Forth, 1917
HMS Marksman, Mindful & Mameluke going to oil, Gutter Sound, 1917
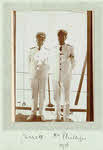 Jarrett and Phillips of HMS Minerva, 1918
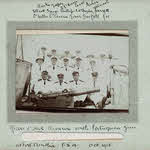 Officers of HMS Minerva at Port Amelia, October 1918 (2 of 2)
 Officers of HMS Minerva at Port Amelia, October 1918 (1 of 2)
 HMS Miranda (D24) from the right
 HMS Mohawk in the Mediterranean, 1940
 HMS Moresby leading 13th Flotilla
 HMS Morning Star, Scapa Flow, 1917
 HMS Mystic and SS Oriana aground, Torcor
HMS Napier and Anzac, Gutter Sound after oiling
 HMAS Nepal and HMS Valiant with British Eastern Fleet
 HMS Neptune leads line of Dreadnoughts
 HMSs Valiant, Nelson, Rodney and Warspite
 Superfiring Turrets on HMS Neptune
 HMS Neptune under construction
 HMS Nereus in the Thames, 1919
 HMS Princess Royal and HMS New Zealand
![]() HMS Norfolk: Type 23 (Duke Class) Frigate
HMS Norfolk: Type 23 (Duke Class) Frigate
![]() HMS Norfolk: Type 23 (Duke Class) Frigate
HMS Norfolk: Type 23 (Duke Class) Frigate
 HMS Petard, HMS Norseman, HMS Tristram and HMS Penn
 HMS Northesk, Gutter Sound, 1917
![]() HMS Northumberland: Type 23 (Duke Class) Frigate
HMS Northumberland: Type 23 (Duke Class) Frigate
![]() HMS Northumberland: Type 23 (Duke Class) Frigate
HMS Northumberland: Type 23 (Duke Class) Frigate
 HMS Nubian (F36) from the left
 HMS Nubian at Alexandria, 1940
 HMS Octavia leaving Invergordon
 HMS Onslaught alongside HMS Diligence
 HMS Onslow towing kite balloon, Kincaldy
 HMS Oracle laying smoke screen
 HMS Orwell refuels from HMS King George V
 HMAS Parramatta at Brindisi, 1918
 HMAS Parramatta being launched, Glasgow, 1910
 View of HMAS Parramatta from the Crow's Nest
HMS Petard, HMS Norseman, HMS Tristram and HMS Penn
 HMS Peyton and US Minelayer in North Sea
 Trawler trying to save HMS Phoenix
 HMS Pheonix listing before sinking
 HMS Porpoise run aground from the rear
 HMS Porpoise run aground from the front
 HMS Porpoise as the Maranhao from the right
 Looking back along HMS Porpoise as the Maranhao
![]() HMS Portland: Type 23 (Duke Class) Frigate
HMS Portland: Type 23 (Duke Class) Frigate
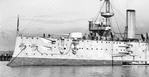
 Powerful Class Cruiser after 1904
 Bow of a Powerful Class Cruiser
 HMS Prince of Wales and HMS McDougal (DD-358)
 HMS Prince of Wales listing before sinking
 HMCS Prince Robert as anti-aircraft cruiser
 HMS Princess Royal from the right
HMS Princess Royal and HMS New Zealand
![]() Fighter pilots of 896 Squadron, HMS Pursuer
Fighter pilots of 896 Squadron, HMS Pursuer
![]() Fighter pilots of 881 Squadron, HMS Pursuer (2 of 2)
Fighter pilots of 881 Squadron, HMS Pursuer (2 of 2)
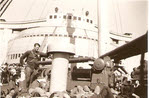 Eugenne Gifford on deck of RMS Queen Elizabeth
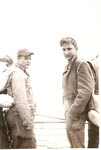 Don Hoffman and Benny J. Hangartner on RMS Queen Elizabeth
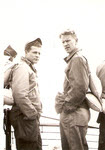 Don Hoffman and Bob S. Tucker Sr on RMS Queen Elizabeth
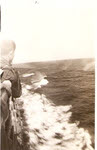 North Atlantic from RMS Queen Elizabeth
 Aircraft Carrier from RMS Queen Elizabeth
 HMS Queensborough, Quality and Quadrant at Auckland
 HMS Racoon at Gallipoli, March 1915
HMS Barham and HMS Radstock, 1917
 HMS Rowena and HMS Radstock, Gutter Sound, 1917
 HMS Raider alongside HMS Warspite
 Changing guns on HMS Ramillies
 General Sir Ian Hamilton on HMS Rattlesnake at Gallipoli
 HMS Renown, Nelson, Duke of York and Victorious, Operation Torch
 HMS Rodney at Mers-el-Kebir, Operation Torch
 Montgomery addresses crew of HMS Rodney
HMSs Valiant, Nelson, Rodney and Warspite
 HMS Royal Oak in Interwar Period
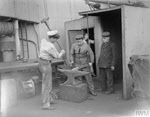 Blacksmith's Shop, HMS Royal Oak
 Firing 15in Guns, HMS Royal Oak
 Clearing Snow off HMS Royal Oak
 Foretop of HMS Royal Oak, 1916
 Royal Sovereign Class battleships Line Ahead (1 of 2)
 Royal Sovereign Class battleships Line Ahead (2 of 2)
HMS Rowena and HMS Radstock, Gutter Sound, 1917
 15in guns of HMS Royal Sovereign
 HMS Royal Sovereign being handed to Soviets
 USS Foote (DD-169) as HMS Roxburgh, Hampton Roads, 3 September 1942
 St. Vincent Class Battleship being Launched
 HMS Salamander (J86) from the left
 Grasshopper Class Torpedo Gunboat HMS Sandfly
 HMS Saumarez, Gutter Sound, 1918
 'S' Class Destroyer HMS Scimitar
 HMS Scorpion, Malta, c.1913-1918
 No.1 Field Ambulance on HMS Scourge, Gallipoli
 HMS Scourge towing boats at Anzac landings
 Sunday Service on HMS Scylla off Normandy
 HMS Sedgefly in action, Tigris, c.1918
 HMS Sepoy with paying off pennant
 HMS Sepoy leaving Hong Kong, 1931
 Surrender of High Seas Fleet seen from HMS Seymour
 Crew of HMS Sibyl after a mission
 Round Table Class Trawler HMS Sir Geraint
 HMS Southampton from the right
 HMS Spitfire showing damage suffered at Jutland
 Stokers in cowling on HMS Spiteful, 1901
 HMS Storm flying the Jolly Roger
 HMS Stour escorting convoy, 1917
 HMAS Stuart refueling from HMAS Canberra
 HMS Sunfish and Ursula being handed to Soviets
 HMAS Swan in heavy seas off France
 Crew of HMS Tactician return home
 HMS Taurus returns home from nineteen months in Far East
 HMS Tempest dropping a Depth Charge
 HMS Templar returns from patrol in Far East, 1944
 HMS Tetrach after dropping depth charges
 Russian Imperial Guard on HMS Tobago, 1919
 Hoisting a torpedo onto HMAS Torrens
 HMS Trespasser returns to Britain, June 1944
 Tribal Class Destroyer from the Right
HMS Petard, HMS Norseman, HMS Tristram and HMS Penn
 Crew of HMS Truant with Victory Flag, late 1942
 HMCS Uganda refueling in the Ryukyus
 Crew of HMS Ultimatum after patrol
 Jolly Roger of USS Ultor, 1944
 Officers of HMS Unsparing, 1944
 Crew of HMS Unsparing sowing victories onto flag
HMS Sunfish and Ursula being handed to Soviets
 Australians moving from HMS Usk to HMS London
 HMS Valhalla with King and Queen onboard, 1921
 HMS Valiant from HMS Queen Elizabeth
HMSs Valiant, Nelson, Rodney and Warspite
HMAS Nepal and HMS Valiant with British Eastern Fleet
 HMS Valkyrie leading the 13th Flotilla in the Baltic, 1919
 Depth Charge Crew on HMAS Vampire
 Compass Platform on HMAS Vampire
 Recovering torpedo on HMAS Vampire
 HMAS Vampire in dry dock at Malta
 Loading Depth Charges onto HMAS Vampire
 HMAS Vampire from searchlight platform
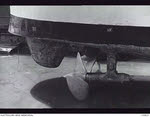 Propeller and Rudder of HMAS Vampire
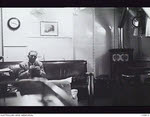 Officer in Wardroom of HMAS Vampire
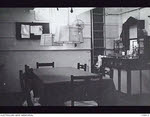 Dining Table in Wardroom of HMAS Vampire
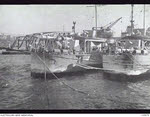 HMAS Voyager and HMAS Vampire at Marseilles
 20mm Breda and 12-pounder on HMAS Vendetta
 HMAS Vendetta firing a torpedo
 Petty Officer's Mess on HMAS Vendetta
 HMAS Vendetta carrying troops to Tobruk
![]() Venerable, HMS, London class battleship
Venerable, HMS, London class battleship
![]() Venerable, HMS, 12in gun turret
Venerable, HMS, 12in gun turret
 HMS Venus, HMS Virago and HMS Vigilant, Sumatra, April 1945
 Admiralty V Class Destroyer HMS Versatile
 HMS Viceroy from the right, 1942
![]() Victorious, HMS : Guarding a convoy to Malta, August 1942
Victorious, HMS : Guarding a convoy to Malta, August 1942
![]() HMS Victorious : classic side view
HMS Victorious : classic side view
 Aircraft taking off from HMS Victorious
 Barracudas return to HMS Victorious
 HMS Violet in Victorian Livery
 HMS Virago in Victorian livery
 HMS Virago firing in honour of King Edward VII
HMAS Voyager and HMAS Vampire at Marseilles
 HMAS Voyager run aground, 1942
 HMAS Voyager run aground, 1945
 Exposed engine room of HMAS Voyager
 Admiralty W Class Destroyer HMS Walker
RFA Maine and HMS Wallace at Constantinople
 HMAS Warrego in Sepik River, New Guinea
 HMAS Warrego with survivors from HMS Phoenix
![]() Warspite, HMS, superfiring 15in guns
Warspite, HMS, superfiring 15in guns
![]() Warspite, HMS, after her second refit
Warspite, HMS, after her second refit
 HMS Warspite and Illustrious class carrier
HMS Raider alongside HMS Warspite
HMSs Valiant, Nelson, Rodney and Warspite
 HMAS Waterhen crippled off Sollum
 'E' Class Destroyer HMS Waveney
 HMS Waveney from the front-left
 King George V on HMS Whirlwind
 Loading food onto HMS Wizard, 1945
 HMS Wolverine's crew celebrate sinking the Italian submarine Dagabur
 HMS Wren rescuing crew of U-608
 Destroyer, British, at Speed
 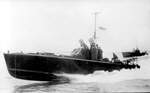 Motor Torpedo Boat, British
  Inside a British Minelayer
 Mines being Laid
 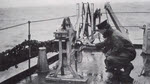 Mine Spacing Machine
 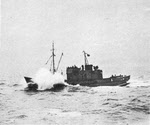 Royal Navy Motor Minesweeper
  Chariot Mk 1 at Rothesay
  Chariot Mk 1 from the Right
  Exiting a Human Torpedo
  Dido Class Cruiser at Anzio
  Fairmile B Motor Launch ML311
  Southampton Class Cruiser
 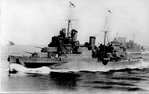 Southampton Class Cruiser
 T Class Submarine from above
  HMS Acasta from the right
  HMS Achates, 1914
 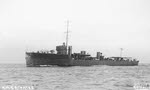 HMS Achates from the left
 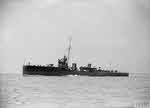 HMS Acheron from the left
 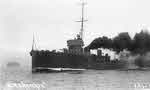 HMS Acheron in the Solent
 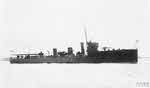 HMS Acorn from the right
 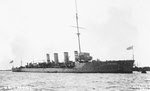 HMS Active from the right
 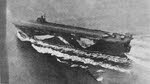 HMS Activity from above
 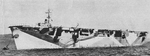 HMS Activity from the left
 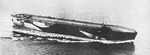 HMS Activity from above
 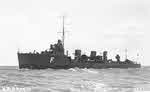 HMS Afridi from the left
  Side view of HMS Agincourt
  HMS Alarm from the left
  AMC Alcantara from the right
 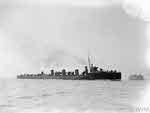 HMS Amazon in the Solent
  HMS Amazon from the left
  HMS Ambuscade from the left
  HMS Amphion at Pembroke, 1913
 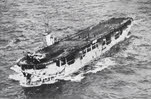 MAC-Ship Ancylus
 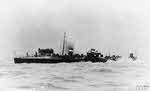 HMS Angler at Sea
 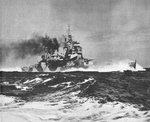 HMS Anson at high speed
 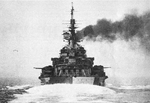 HMS Anson from the stern
 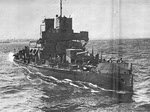 HMS Aphis from the front
  HMS Arab at sea
  HMS Arab from the right
  HMS Archer from the right
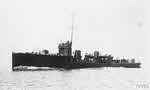 HMS Archer from the left
 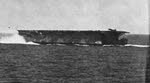 Side view of HMS Argus
  HMS Argus from above
  HMS Argus from the right
 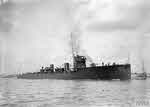 HMS Ariel from the right
  HMS Ariel from the left
 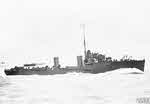 HMS Arun in 1910
 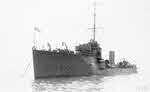 HMS Arun from the left
  HMS Attack from the left
  HMS Audacious sinking, 1914
 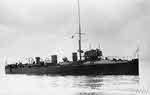 HMS Avon from the right
 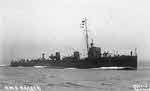 HMS Badger from the right
  HMS Banshee in heavy seas
  HMS Barfleur from the left
  HMS Basilisk in 1910
  HMS Basilisk, 1937
 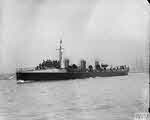 HMS Bat at Portsmouth
  HMS Bayntun from the stern
 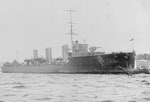 HMS Beagle from the right
  HMS Beagle from the left
  HMS Beaver from the left
 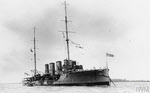 HMS Bellona from the right
  HMS Birkenhead from the right
  HMS Birmingham from the right
  Close-up view of HMS Bittern
 HMS Blanche from the right
  HMS Blonde from the right
  HMS Bonetta from the right
  HMS Bonetta from the left
 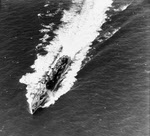 HMS Boreas in 1939
  HMS Boxer at Sea
  HMS Boxer in 1895/6
  HMS Boyne from the right
 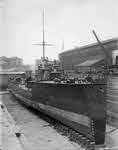 HMS Boyne in drydock
  HMS Brazen from the right
  HMS Brazen, 1931
  Side view of HMS Brecon (L76)
 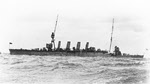 HMAS Brisbane from the left
  HMS Brisk from the left
  HMS Bristol from the right
  HMS Broke in Dover Harbour
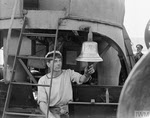 New bell on HMS Broke
 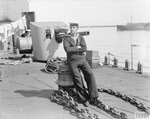 L. S. Ingleson on HMS Broke
 HMS Broke from the right
  HMS Bulldog, Malta, 1930s
  HMS Bulldog from the left
  HMS Bullfinch from the left
  Crew of HMS BYMS 2234, 1944
  HMS Cairo, 14 October 1941
  HMS Cairo in 1920
  HMS Calliope from the right
 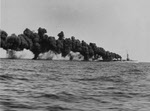 HMS Calypso making smoke
  HMS Cameleon from the left
  HMS Canada from the left
  HMS Canada from the side
 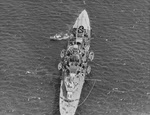 HMS Capetown from above
 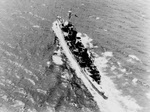 HMS Caradoc from above
 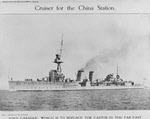 HMS Caradoc from the left
 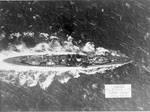 HMS Cardiff from above
  HMS Cardiff from the left
  HMS Carlisle in China, 1920s
  HMS Cassandra from the left
  HMS Ceres, 1932
  HMS Ceres from the right
  HMS Challenger in East Africa
 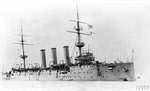 HMS Challenger from the right
 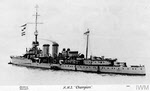 HMS Champion from the left
  HMS Chatham from the left
  HMS Cheerful from the left
 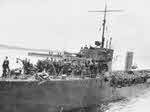 HMS Chelmer at Mudros, 1915
  HMS Chelmer from the left
 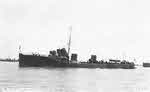 HMS Cherwell from the left
 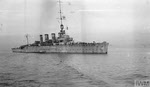 HMS Chester, February 1917
 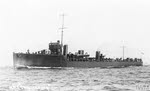 HMS Christopher from the left
  HMS Cockatrice from the left
 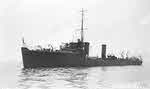 HMS Colne from the left
 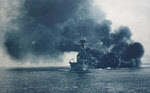 HMS Colossus fires broadside
 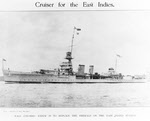 HMS Colombo in 1932
  HMS Comet in 1918
 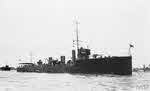 HMS Comet from the right
  HMS Comus at Kure, 1950
  HMS Conflict on speed trials
 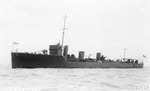 HMS Contest from the left
 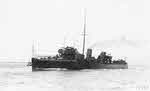 HMS Coquette at sea
 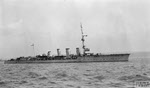 HMS Cordelia at a buoy
 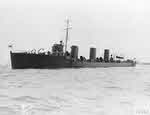 HMS Cossack in 1913
 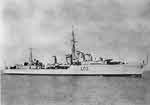 HMS Cossack c.1940
 HMS Cotillion from the right
 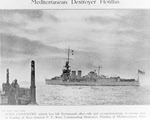 HMS Coventry in 1931
  HMS Crane from the right
  HMS Crusader at Dover
  HMS Crusader from the left
 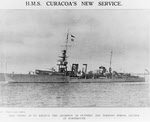 HMS Curacoa in 1933
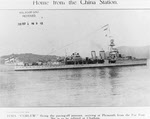 HMS Curlew in 1928
  HMS Cynthia from the right
 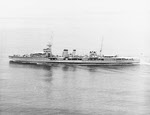 HMS Danae at San Diego, 1934
 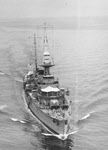 Front view of HMS Danae
  HMS Dartmouth from the right
  HMS Dauntless in 1942
 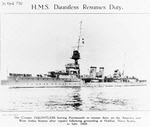 HMS Dauntless in 1930
 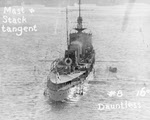 Rear view of HMS Dauntless
 HMS Defence from the right
  HMS Defender from the left
  HMS Derwent from the left
  HMS Derwent at speed
  HMS Derwent going astern
  HMS Derwent from port quarter
  HMS Despatch in 1939
  HMS Devonshire
 HMS Devonshire from the right
  HMS Diamond from the left
  HMS Diana from the right
  HMS Dido from the right
  HMS Doon from the right
  HMS Doris from the right
  HMS Dove from the right
  4in Gun on HMS Dragon
 6in Gun on HMS Dragon
  HMS Dragon at Portland, 1933
  HMS Dreadnought after launch
  Front view of HMS Dreadnought
 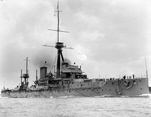 Side view of HMS Dreadnought
 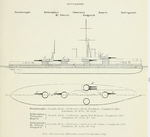 Plans of HMS Dreadnought
 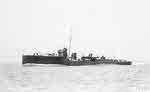 HMS Druid from the left
  HMS Dublin from the left
 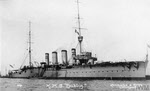 HMS Dublin from the right
  Starboard view of HMS Duncan
 HMS Dunedin at Honolulu
  Bridge of HMS Dunedin
  Funnels of HMS Dunedin
  HMS Durban at Honolulu
 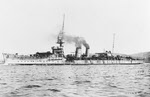 HMS Durban from the left
  Sailors cheering HMS E-11
  HMS Eclipse from the left
  HMS Eden from the right
 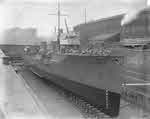 HMS Eden from the bows
 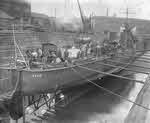 HMS Eden from the stern
  HMS Electra coming alongside
  HMS Emerald after 1936 refit
 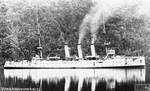 HMAS Encounter from the right
  Side view of HMS Erebus
  Rear view of HMS Erebus
  HMS Erne from the left
 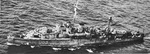 HMS Erne (U03) from the left
  HMS Ettrick from the right
  Side view of HMS Euryalus
  HMS Exe from the left
 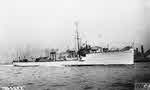 HMS Exe from the right
  Plans of HMS Express
  HMS Express, 1942
  HMS Fairy in Victorian Livery
  HMS Falcon from the right
 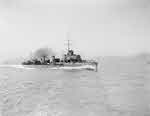 HMS Falcon at Speed
  HMS Falmouth from the left
  HMS Fame from the left
  Officers of HMS Fame, 1900
 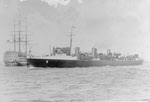 HMS Fawn passing HMS Victory
  HMS Fawn inshore
  HMS Fearless from the right
  HMS Ferret from the left
 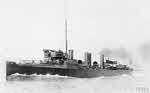 HMS Fervent at sea
 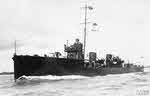 HMS Firedrake from the left
 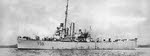 Side view of HMS Fishguard
 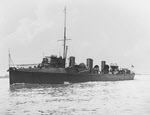 HMS Flirt from the left
 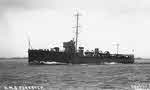 HMS Forester from the left
 HMS Fortune from the left
  HMS Foxhound from the right
  HMS Foxhound at Gallipoli
 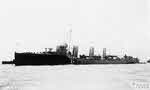 HMS Foxhound from the left
 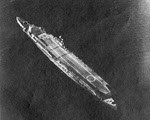 HMS Furious from above
 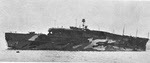 HMS Furious from the left
 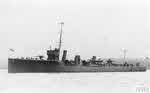 HMS Fury from the left
 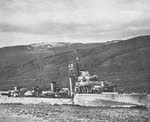 'F' Class Destroyer HMS Fury
 HMS Gabriel at Derry, 1917
  HMS Garland, 1948
  HMS Garland from the right
 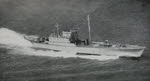 Blockade Runner MV Gay Viking
 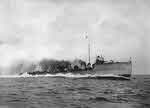 HMS Ghurka from the right
 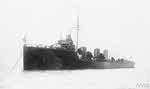 HMS Ghurka from the left
 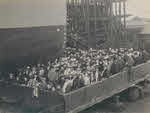 Launch of HMS Ghurka
 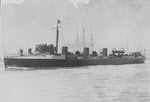 HMS Gipsy from the left
  HMS Gipsy from the left
 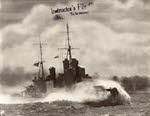 HMS Glasgow in heavy seas
  HMS Gloucester from the right
 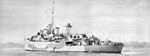 Side View of HMIS Godavari
 HMS Goldfinch from the right
  HMS Goshawk from the left
 HMS Greyhound in Dry Dock
 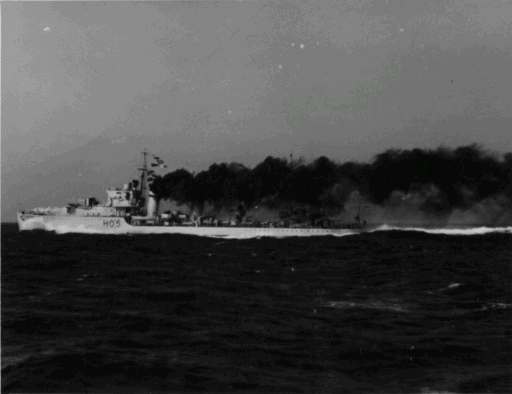 HMS Greyhound
  Side view of HMS Guardian
  HMS Hardy from the right
  HMS Harpy from the right
  HMS Harpy in 1918-19
 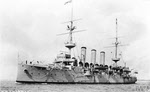 HMS Hermes from the left
  HMS Hero turret ram
  HMS Hero, 1937
  Payday on HMS Hero, 1942
 Bow of HMS Highflyer
  Side view of HMS Highflyer
  Side view of HMAS Hobart
  HMAS Hobart from the left
  HMS Southdown from HMS Holmes
 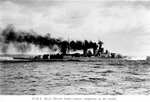 HMS Hood at speed
 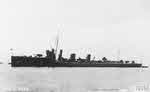 HMS Hope from the left
  HMS Hornet from the left
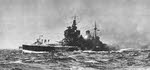 Side view of HMS Howe
 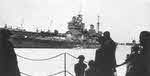 HMS Howe at Auckland
  HMS Humber, 1914
  HMAS Huon firing a torpedo
  HMAS Huon at Iron Cove, 1915
 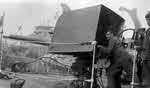 4in Gun on bow of HMAS Huon
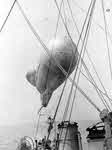 Kite Balloon on HMAS Huon
  HMS Hyacinth from the right
  HMS Hydra from the left
 HMS Illustrious before 1904
  HMS Inconstant from the left
  Invincible, HMS
 HMS Invincible from the right
 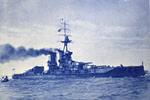 HMS Iron Duke from the right
  HMS Isis from the left
  HMS Itchen from the left
  HMS Itchen from the stern
 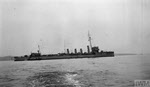 HMS Ithuriel in Gutter Sound
 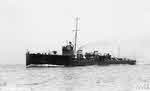 HMS Jackal from the left
 HMS Jamaica from the left
  HMS Janus at Alexandria, 1940
  HMS Jed from the right
 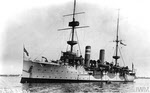 HMS Juno from the left
 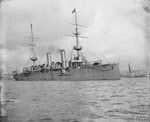 HMS Juno, 1904
  HMS Kale from the right
  HMS Kempenfelt, 1917
 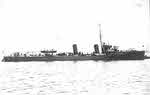 HMS Kennet from the right
  HMS Kent from the left
  HMS Keppel in 1943
  HMS Kestrel at sea
 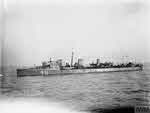 HMS Kestrel from the left
  HMS King George V from above
  HMS King George V at sea
  Side view of HMS Kite
  HMS Laertes (1913)
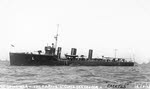 HMS Laertes from the left
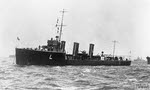 HMS Laforey from the left
 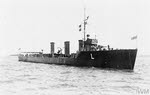 HMS Lance from the right
  HMS Landrail from the left
 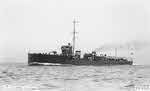 HMS Lapwing from the left
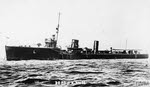 HMS Lark from the left
 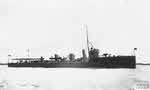 HMS Larne from the right
 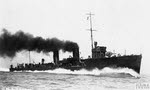 HMS Laurel from the right
 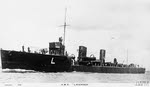 HMS Laverock from the left
  HMS Lawford from the left
 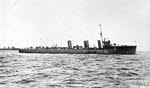 HMS Legion from the right
 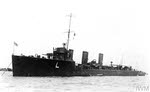 HMS Lennox from the left
 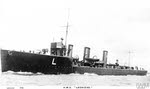 HMS Leonidas from the left
 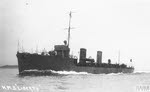 HMS Liberty from the left
 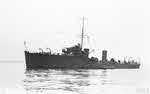 HMS Liffey from the left
  HMS Lightfoot in Drydock
 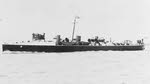 HMS Lightning c.1900
 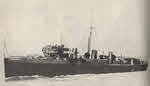 HMS Lightning in 1912
  HMS Linnet from the left
 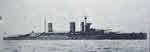 HMS Lion
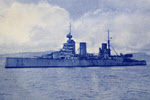 HMS Lion from the left
  HMS Lively from the left
  HMS Liverpool from the right
 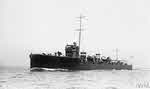 HMS Lizard from the left
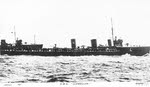 HMS Llewellyn from the right
  HMS Lochinvar from the right
  HMS Locust from the left
 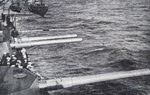 9.2in guns of HMS Lord Nelson
  HMS Louis from the left
  HMS Loyal from the left
  HMS Lucifer from the left
 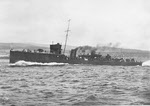 HMS Lurcher from the left
 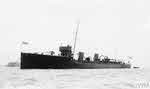 HMS Lurcher in the Solent
 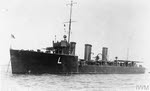 HMS Lydiard from the left
 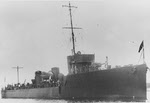 HMS Lynx from the right
 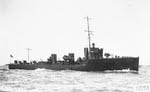 HMS Lynx from the right
 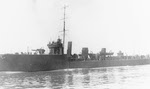 HMS Lyra from the left
  HMS Lysander from the left
  HMS Magic, Scapa Flow, 1917
 HMS Malaya from the right
 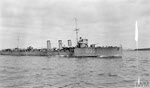 HMS Mandate, Scapa Flow, 1917
 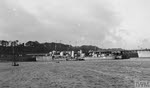 HMS Manly from the left
  Refuelling HMS Manxman
  Mines for HMS Manxman
 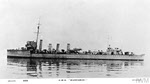 HMS Marksman from the left
 HMS Martin from the left
  HMS Marvel, 1917
  HMS Mary Rose from the right
 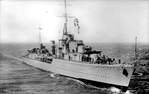 Mashona, HMS
  HMS Menestheus from the left
  Side View of HMS Meteor
  HMS Meteor from above
 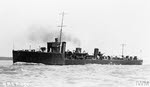 HMS Midge from the left
 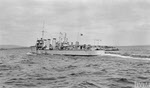 HMS Minion, Scapa Flow, 1917
 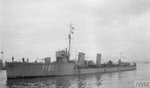 HMS Minos (H81) from the left
 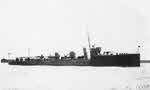 HMS Minstrel from the right
 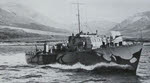 HMS ML136 off Fort William
  HMS Mohawk from the right
 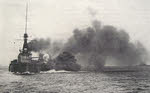 HMS Monarch firing broadside
  HMS Monmouth from the left
 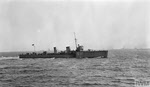 HMS Moon, Scapa Flow, 1917
 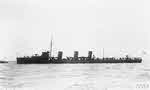 HMS Mosquito from the left
  HMS Mounsey (G1A), 1919
  HMS Moy from the left
 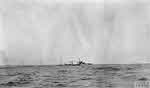 HMS Moy in convoy
  HMS Munster, 1917
  HMS Musketeer, 1919
  HMS Myrmidon at Sea
 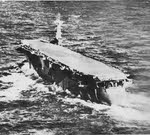 HMS Nairana from behind
  HMS Narborough, 1917
 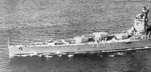 HMS Nelson: Main Guns
  HMS Nelson with the fleet
  HMS Nelson from the right
 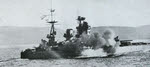 HMS Nelson firing 6in guns
 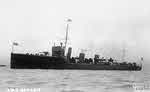 HMS Nemesis from the left
  HMS Nepean, Inchkeith, 1917
 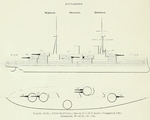 Plans of HMS Neptune
 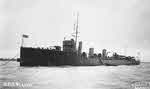 HMS Nereide from the left
 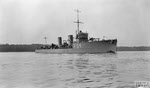 HMS Nerissa, 1917
 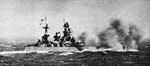 HMS Nelson firing main guns
 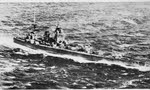 HMS Nelson from above
  Side view of HMS Neptune
  HMS Neptune from the left
  Side view of HMS Ness
  HMS New Zealand from the left
 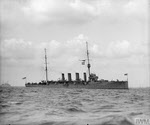 HMS Newcastle from the right
  HMS Nicator, 1917
  HMS Nith from the right
  HMS Nith escorting a convoy
 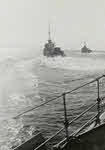 HMAS Nizam and HMS Racehorse
  HMS Noble, 1917
  HMS Noble/ HNLMS Van Galen
  HMS Norman, 1919
 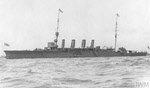 HMS Nottingham from the left
  HMS Nubian on the rocks
  HMS Nymphe from the left
  HMS Oak from the left
 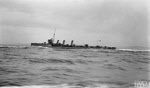 HMS Obdurate, Inchkeith
  Bridge of HMS Oberon
 Oberon, HMS
 HMS Observer, 1917
  HMS Opossum in 1897
  HMS Opportune, 1918
 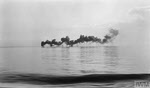 HMS Oracle making smoke
 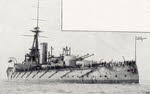 Super-dreadnought HMS Orion
 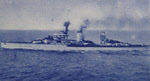 HMS Orion from the left
  HMS Ouse from the right
 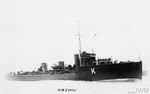 HMS Owl from the right
 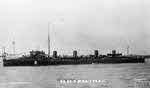 HMS Panther from the left
 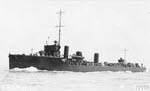 HMS Paragon from the left
 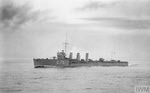 HMS Parker from the left
 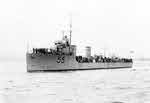 HMAS Parramatta from the left
  HMS Patrician, 1919
  HMCS Patriot or Patrician
 HMS Patriot, 1919
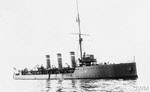 HMS Patrol from the right
 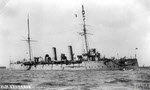 HMS Pegasus from the right
  HMS Pelorus from the right
  HMS Penn, 1917
 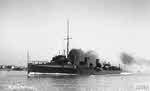 HMS Peterel at Sea
 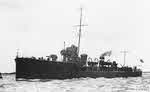 HMS Phoenix from the left
 HMS Pigeon, 1917
 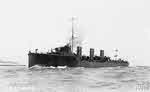 HMS Pincher from the left
 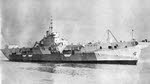 HMS Pioneer from the right
 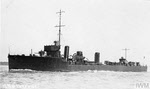 HMS Porpoise from the left
 HMS Proserpine from the left
  HMS Psyche from the left
  HMS Pyramus from the left
 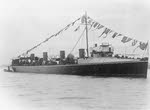 HMS Quail in Victorian livery
 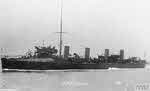 HMS Quail from the left
  HMS Queen Elizabeth gallery
  HMS Queenborough, 1942
 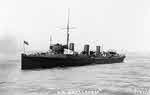 HMS Racehorse from the left
 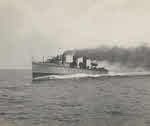 HMS Racehorse at speed
 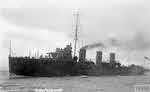 HMS Racoon from the left
 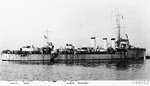 HMS Raider from the right
 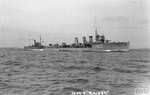 HMS Raider at sea
 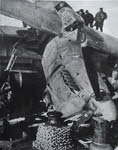 Barracuda crash on HMS Rajah
  HMS Ranger in 1897
  HMS Rigorous and HMS Rapid
 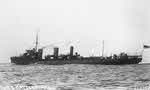 HMS Rattlesnake from the left
 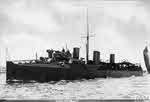 HMS Recruit from the left
 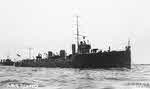 HMS Redpole from the right
 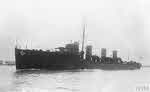 HMS Renard from the left
 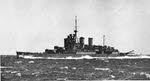 HMS Renown from the left
 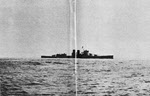 HMS Renown from the right
 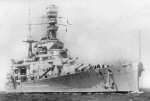 HMS Repulse in 1936
  HMS Retriever from the right
 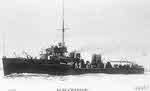 HMS Ribble from the left
 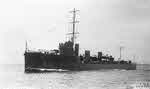 HMS Rifleman from the left
  HMS Rob Roy from the left
  HMS Roberts from the left
 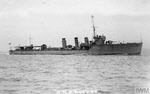 HMS Rocket from the right
  HMS Rodney's 16in Guns
  HMS Rodney from above
  HMS Rosalind from the right
  HMS Royal Oak underway, 1937
  HMS Royal Oak firing 6in Guns
 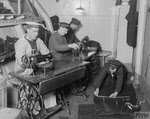 Tailors on HMS Royal Oak
  Aft 15in Guns, HMS Royal Oak
  Searchlight on HMS Royal Oak
 Cleaning Mast, HMS Royal Oak
 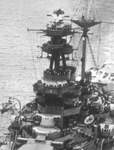 Bridge of HMS Royal Sovereign
 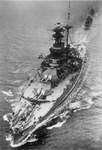 HMS Royal Sovereign
  HMS Ruby from the left
  HMCS St. Croix, 1941
  HMS Sabrina from the right
 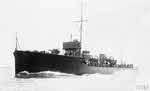 HMS Sandfly from the left
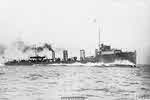 HMS Saracen from the right
  HMS Sarpedon, 1919
  HMS Savage from the right
 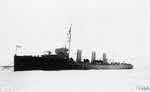 HMS Scorpion from the left
 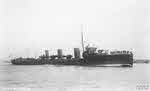 HMS Scourge from the right
 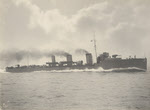 HMS Scourge at sea
  HMS Scylla from the right
 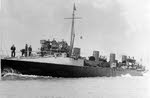 HMS Seal in Victorian livery
 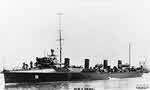 HMS Seal from the left
  HMS Sepoy at Hong Kong, 1931
 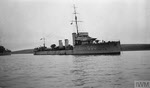 HMS Seymour from the front
  HMS Seymour from the rear
 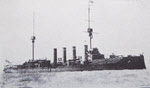 HMS Shannon from the right
  HMS Shark from the left
  HMS Sheldrake from the left
 HMS Sirdar (D.59)
  HMS Somme at Hong Kong
  HMS Sparrowhawk from the left
  Acasta class HMS Sparrowhawk
 HMS Spartan from the right
 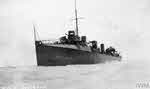 HMS Spiteful from the front
  HMS Spiteful from the left
 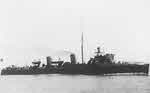 HMS Stag from the right
 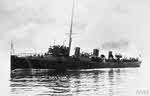 HMS Star at sea
 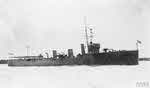 HMS Staunch from the right
 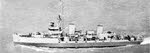 Side view of HMS Strenuous
  HMS Strongbow from the left
  HMAS Stuart from the front
  HMAS Stuart in 1935
 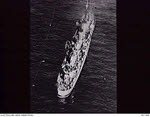 HMAS Stuart from the air
  HMAS Stuart in 1939
  HMS Sunfish from the left
  HMS Success from the left
  HMS Superb from the right
 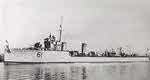 HMAS Swan at Melbourne, 1920
  Cleaning torpedo on HMAS Swan
  Ship's Mascot on HMS Swift
 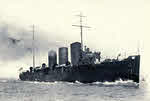 HMS Swift from the right
 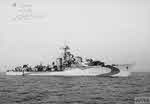 HMS Swift in the Solent
  Sydney, HMAS- 6in gun
  HMAS Sydney from the right
  HMS Syren at sea
  HMS Tartar from the right
 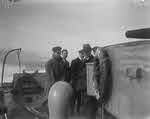 Sam Hughes on HMS Tartar
 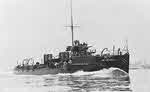 HMS Teviot from the right
 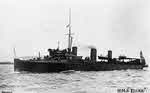 HMS Thorn from the left
 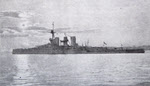 HMS Tiger at Scapa Flow
 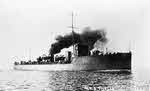 HMS Tigress from the right
 HMAS Torrens from the left
  HMAS Torrens off Singapore
  HMS Ulster Queen
 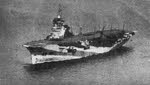 HMS Unicorn from above
 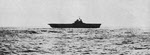 HMS Unicorn from the side
 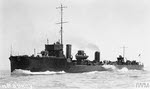 HMS Unity from the left
  HMS Ure in the Solent
  HMS Usk at Mudros, 1915
 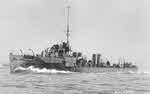 HMS Usk from the left
 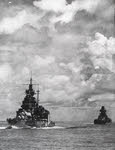 HMS Valiant off Sabang 1945
  HMAS Vampire in rough seas
 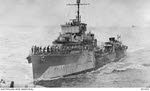 HMAS Vampire from the front
 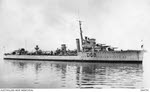 HMAS Vampire from the right
  Shells on HMAS Vampire
  HMS Vanquisher in 1943
  HMS Vansittart as escort
 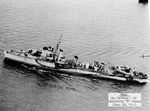 HMS Vega in 1943
 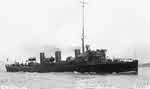 HMS Velox at sea
 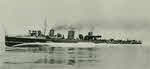 HMS Velox at Speed
 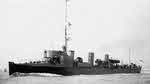 HMS Velox from the left
 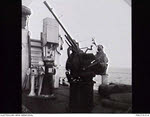 20mm Breda on HMAS Vendetta
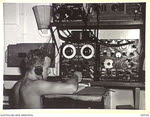 Radio on HMAS Vendetta
 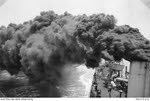 HMAS Vendetta making smoke
 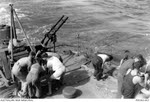 Torpedo men on HMAS Vendetta
 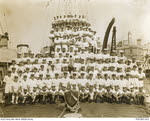 Crew of HMAS Vendetta in 1940
 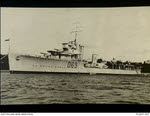 HMAS Vendetta at Syndey
 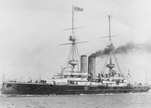 HMS Vengeance before 1904
  HMS Venturer (P68)
 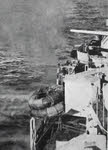 4.7in gun of HMS Verulam
 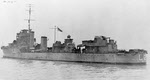 HMS Viceroy in 1942
 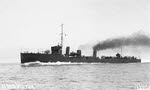 HMS Victor from the left
 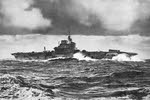 HMS Victorious in heavy seas
 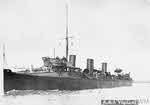 HMS Vigilant at sea
  HMS Viking from the right
 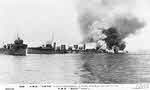 HMS Viking on fire
 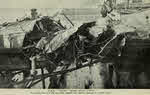 Mine damage to HMS Viking
 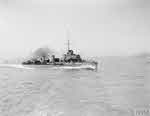 HMS Violet at speed
  HMS Virago from the front
  HMS Viscount in 1942
  Living space on HMS Voracious
 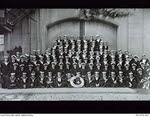 Delivery crew of HMAS Voyager
  HMAS Voyager from the right
  HMS Vulture from the right
  HMAS Warrego, Malta, 1917
 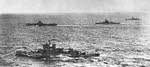 HMS Warspite with fleet
 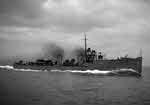 HMS Waveney from the right
 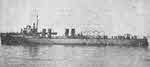 HMS Welland from the left
  HMS Westminster in 1940
  HMS Whiting on a speed trial
 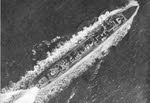 HMS Winchester from above
  HMS Wizard after c.1908
  HMS Wizard before 1908
  HMS Wolf in Victorian Livery
 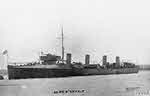 HMS Wolf from the left
  HMS Wolverine from the left
  HMAS Yarra from the left
  HMAS Yarra from the bows
  HMAS Yarra in Dry Dock
 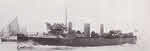 HMS Zephyr with four funnels
 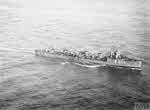 HMS Zubian from the air
 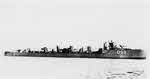 HMS Zubian from the right
 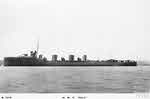 HMS Zulu from the left
 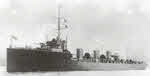 HMS Zulu from the left
  Launch Party for HMS Zulu