Battle of Magenta, 4 June 1859
The battle of Magenta (4 June 1859) was the first decisive battle of the Second War of Italian Independence and was a badly managed encounter battle that ended as an Austrian defeat, and that forced them to evacuate Lombardy, surrendering it to Napoleon III and Piedmont.
At the start of the war the Piedmontese had been outnumbered by the Austrians, but the Austrians failed to take advantage of their chance to win an early victory and moved very slowly, giving Napoleon III the time he needed to move his army into place in Piedmont. By 12 May the two sides were roughly equal in strength. The Austrians had crossed the Ticino River and invaded Piedmont, but had stopped along the Po and the Sesia. The first battle of the campaign had been fought south of the Po, at Montebello (20 May 1859) and had convinced the Austrians that Napoleon intended to move east around their left flank.
The Austrian commander, Feldzeugmeister Franz Count Gyulai, moved his army south, leaving his right flank rather weak. Napoleon III decided to take advantage of this by using Piedmont's railway network to shift his army left, around the Austrian right flank. This would allow the Allies to threaten Milan and hopefully force the Austrians to retreat out of Piedmont without fighting a major battle.
The plan worked exactly as the Allies had hoped. The French move took place on 27-29 May and by 30 May most of the Allied army was at Casales or further north at Vercelli. On 30 May the Piedmontese army crossed the Sesia and pushed back the Austrian defenders of Palestro. On the following day they repulsed an Austrian counterattack and established a sizable bridgehead across the river (battle of Palestro, 30-31 May 1859).
By 1 June Gyulai had finally realised what had happened. His first reaction was to plan to attack the Allied columns at Novara, the site of Radetzky's victory in 1849, but Gyulai was not as capable a commander. The chance slipped away, and by the end of the day the Allies were safe from such an attack - four French corps were in a line from Vercelli to Novara, shielded by 40,000 Piedmontese. The Allies were moving too fast for Gyulai, who decided that his only chance of saving Milan was to order a retreat to the line of the Ticino River.
On 2 June the Austrians began their retreat. II, III and VII Korps retreated from the area around Mortara towards Vigevano, while V and VIII moved from the Po towards the southern Ticino. IX Korps was also called in from Piacenza, but was kept closer to the Po. The Austrians spent much of 3 June arguing about which side of the Ticino to defend. Feldmarshall Heinrich von Hess arrived at Gyulai's headquarters to act as Franz Josef's envoy. He preferred to stay on the west bank, but eventually had to concede that this wasn't possible. The retreat continued despite the arguments. II Korps moved north to Magenta and Robecco. It joined Clam-Gallas's I Korps, which arrived at Magenta from Milan. Benedek's VIII Korps moved towards Milan, while III, V and VII Korps moved towards the army headquarters at Abbiategrasso, five miles to the south of Magenta.
While the Austrians were arguing about which side of the river to defend, the Allies were already across. Their advance guard had found the ferry crossing at Turbigo unguarded on 2 June, and had a bridge across by 3 June. MacMahon's II Corps crossed the river on 3 June and defeated the local Austrian forces (battle of Turbigo, 3 June 1859). More importantly they also crossed the Naviglio Grande (Grand Canal), in some ways a more significant barrier than the Ticino. On 4 June the Austrians successfully defended the limited crossing points over the Canal nearer to Magenta for some time.
At the start of 4 June the bulk of the French army was still approaching the Ticino and the Canal, delayed by terrible road conditions. The Imperial Guard was on the river, while MacMahon's II Corps was already across. Fanti'2 2nd Divison of Piedmont was just behind MacMahon. Canrobert's III Corps was next in the line of march, followed by Niel's IV Corps. The Allies had finally outrun the railways, and the roads were blocked with countless supply wagons, greatly slowing down Canrobert and Niel. Magenta was held by Clam Gallas's I Korps and elements of II Korps.
Neither side expected a major battle on 4 June. The Austrians expected to have a day to recover from the retreat while the Allies prepared for a major river crossing, unaware that MacMahon was already across. Napoleon III didn't expect the Austrians to try and defend the east bank of the Ticino having failed to hold onto the easier to defend western bank. His plans for the day were thus for a fairly simple operation to seize control of the canal bridges west of Magenta in preparation for an advance on Milan. The main road crossed the canal at Ponte Nouvo, while there was another crossing a little further north at Buffalora and a third just to the south at Ponte Vecchio. Mellinot's Guard Grenadier division was to make a frontal assault on these bridges, with the 2nd Grenadier Regiment attacking at Buffalora and the 1st and 3rd at Ponte Nouvo. MacMahon was expected to arrive at Buffalora at about the same time as the Grenadiers, so the canal crossing wouldn't have been opposed. The Piedmontese would cover MacMahon's left flank, while Canrobert would cover the Guard's right.
Only part of each army would be involved at Magenta. The French managed to get around 50,000 men into the battle, while the Austrians probably used around 58,000.
The Battle
MacMahon's II Corps moved south-east in two columns. La Motterouge's division was on the right, close to the canal, with Espinasse's division further to the east, heading towards Inveruno, north of Magenta. Camou's Guard division was some way behind La Motterouge, with Fanti's Piedmontese division further behind. MacMahon had not expected to run into any significant resistance, so when his advance guards found Kudelka's brigade from II Korps and Recznicek's brigade from I Korps posted to the north of Magenta he decided to pause to allow all of his troops to arrive on the scene before he launched a formal assault on the Austrian positions. This meant that the eastern bank of the canal remained in Austrian hands far longer than Napoleon III had expected.
The Imperial Guard began its attack at around 1.30pm. The 32nd Grenadiers attacked towards Buffalora, the zouaves and 1st Grenadiers to Ponte Nouvo and the 3rd Grenadiers to Ponte Vecchio. The French were able to seize the western end of the bridges, but the Austrians managed to blow the bridge at Ponte Vecchio while Boffalora Bridge was already blown. In the centre the zouaves captured the Ponte Nouvo intact, but the Austrians still held the higher ground east of the canal.
At around 1.30 Gyulai and Hess finally reached Magenta. At this point the situation didn’t look too bad. MacMahon had apparently stalled in the north while the canal line was still just holding. When the Ponte Nouvo fell he ordered Reischach's Division up to restore the line, and then left to organise a more threatening counterattack. Schwarzenberg's III Korps was ordered to advance north along the western bank of the canal, towards the Guard units still fighting at the bridges.
Reischach's counterattack was a great success and the French Grenadiers were forced back into a small bridgehead east of the canal. At about 4.30 the first part of the Austrian counterattack hit the French right. Brigade Kintzl from II Korps pushed the French back from Ponte Vecchio back to Ponte Nouvo, nearly isolating the troops on the east bank. This attack began at around 4.30, and might have resulted in an Austrian victory if French reinforcements had not arrived. Just in time Picard's Brigade from Canrobert's III Corps reached the battle, and helped to push the Austrians back. The French were still outnumbered at Ponte Nouvo, as Schwarzenberg had joined the attack, but Canrobert managed to hold them off. At around 5pm Vinoy's Brigade from Niel's IV Corps also reached the battle. They moved behind Canrobert and reached the battle at Ponte Nouvo, finally securing that bridge and expanded the bridgehead.
MacMahon's attack in the north began at around 3.30pm. La Motterouge forced the Austrians out of Buffalora, and made contact with the French troops on the west side of the canal. Espinasse advanced south towards Magenta, but was attacked by Baltin's and Reznicek's brigades. The Austrian counterattack forced the French to retreat for a short distance but was eventually beaten off. Clam Gallas was forced to pull back into Magenta, where he prepared to defend the line of the railway.
At around 7pm MacMahon launched his final attack on Magenta. Vinoy's division, which was now across the canal, formed the right. La Motterouge was in the centre and Espinasse on the left. The French supported their attack with two large gun batteries - one of 39 gins on the railway embankment north of the town and one of 30 across the canal. The guns had a devastating effect. Most Austrian troops in the town attempted to escape, although fierce street fighting went on for some time. Espinasse was killed in the fighting
The fall of Magenta was the signal for a general Austrian retreat. Lilia's division of VIII Korps and Brigade Dormus of V Korps, both so far unengaged, provided an effective rearguard, and protected the retreating army against any Allied pursuit. On the west bank of the canal Schwarzenberg retreated after fresh French troops arrived. The battle had been a close fought and costly affair. The French lost 707 dead, 3,223 wounded and 655 missing, a total of 4,585 casualties. The Austrians lost 1,368 dead and 4,358 wounded, not that much worse than the French, but a massive 4,500 missing (many of whom deserted).
Napoleon III celebrated his victory in a way that his uncle Napoleon would have approved of. Regnaud St Jean d'Angély, commander of the Imperial Guard, was promoted to Marshal, while MacMahon was made Marshal and Duc de Magenta.
In the aftermath of their defeat at Magenta the Austrians were forced to retreat to the south-east. This exposed Milan, and on 8 June Victor Emmanuel and Napoleon entered the Lombard capital in triumph. Gyulai withdrew to the Chiese River, east of Milan. The defeat and the loss of Milan resulted in a major reorganisation of the Austrian army. Gyulai resigned on 18 June, and the Emperor Franz Josef took direct control. He split the 2nd Army into two, each with four corps. 1st Corps was commanded by Feldzeugmeister Count Wimpffen and 2nd Corps by General der Kavallerie Count Schlick. The reorganised army pulled back to the Mincio River, where it received reinforcements and prepared to return to the offensive. Franz Josef had two choices - he could defend the strong fortified area know as the Quadrilateral, or he could return to the offensive and try and win a quick victory that would restore his control over Lombardy. On 23 June his armies began to move west, but on the following day the Austrians ran into the advancing Allies. The resulting battle of Solferino (24 June 1859) was the final, decisive, battle of the war, and ended as another hard-fought Austrian defeat.
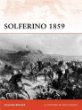 Solferino 1859: The Battle for Italy's Freedom, Richard Brooks
. The battle of Solferino was the main event in the Franco-Austrian War of 1859, a key moment in the unification of Italy, and the first battle to be decided at least partly by the extensive use of the railway and steamships and rifled artillery. It also led directly to the foundation of the Red Cross, but despite these claims to fame it has since been overshadowed by the American Civil War and Franco-Prussian War. Brooks' volume is an excellent single-volume account of the entire campaign, and will be of value to anyone with an interest in nineteenth century warfare [
see more].
How to cite this article:
Rickard, J (8 February 2013), Battle of Magenta, 4 June 1859, http://www.historyofwar.org/articles/battles_magenta.html
 The Second War of Italian Unification 1859-61, Frederick C. Schneid. Focuses on the three separate conflicts that made up the Second War of Italian Unification (the Franco-Austrian War, Garibaldi's invasion of the kingdom of Naples and the invasion of the Papal State), the conflict that saw the creation of the Kingdom of Italy. [read full review]