|
|
|
|
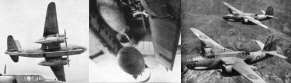 A-20 Havoc, Douglas
(22 pictures)
A-20 Havoc, Douglas
(22 pictures)
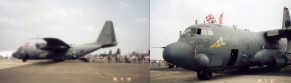 AC-130 Lockheed Spectre Gunship (nine pictures)
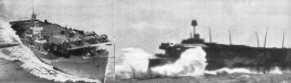 Aircraft Carriers (collection)
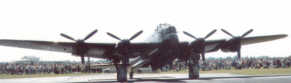 Avro Lancaster Picture Gallery
 37mm Antitank Gun M3A1 on Okinawa
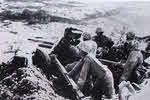
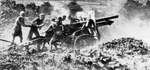
 4.5in gun Mark 2, El Alamein, 1942
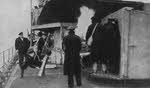 Naval gunners training on 4.7in guns
 5.5in Gun of Eighth Army, Sicily 1943
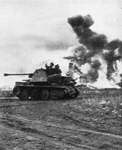 7.5cm PaK40/3 auf Panzerkampfwagen 38(t), Byelgorod
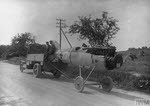
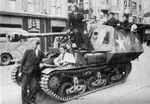 7.5cm PaK40/1 auf Geschützenwagen Lorraine Schlepper (f)
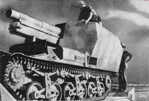 15cm sFH13/1(Sf) auf Geschutzwagen Lorraine Schlepper (f)
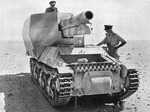 15cm sFH13/1(Sf) auf Geschutzwagen Lorraine Schlepper (f)
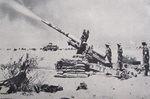
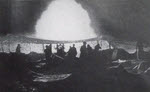 155mm 'Long Tom' gun of US 9th Army firing at night
 Waterproofing 17-pounder anti-tank guns
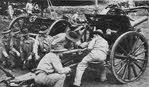 Australian troops training with 18pdr Mk IV
 21cm Nebelwerfer 42 rocket launcher
 25-pdr Field Gun, Mount Etna 1943
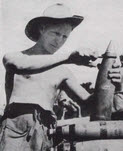 British gunner fusing a 25-pounder shell
 57mm Anti-Tank Gun Model 1943, Soviet Union
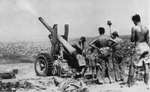
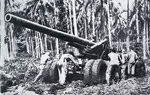 US 155mm Gun M1 (Long Tom) on Rendova Island
 155mm Gun M1 being towed, Rendova
 Admiral Scheer sunk at Kiel
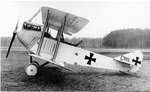
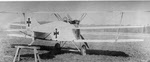
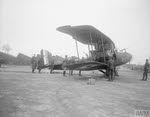
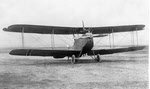
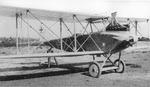
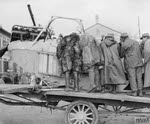
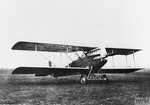
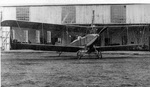 A.E.G. B.I from the Front, 1914
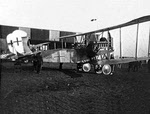
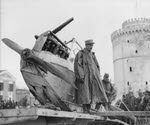
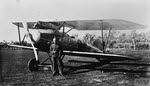
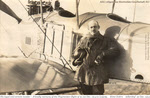 Rimo Dohrn in front of A.E.G. B.I, Adlershof, 1914
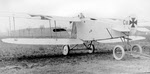
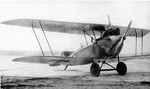
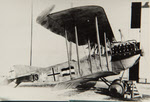
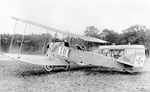 A.E.G. B.II from the left, 1915
 A.E.G. C.II from the left, 1915
 A.E.G. C.III from the Back Left
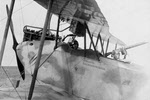
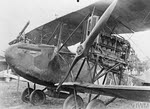
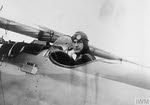
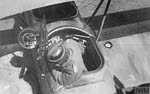 A.E.G. C.IV cockpit seen from above
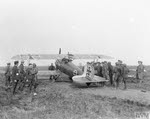
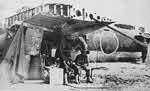
 A.E.G. C.IV being unloaded from train, Taurus Mountains
 A.E.G. C.IV overturned near Beirut, 1917
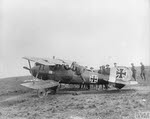
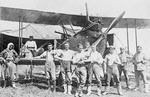 A.E.G. C.IV with German Soldiers, Palestine, 1916
 A.E.G. C.IV and Crew, Palestine, 1916
 A.E.G. C.V from the left, 1915
 A.E.G. C.VII from the left, 1917
 A.E.G. C.VII from the front, 1917
 A.E.G. Dr.I from the rear, 1917
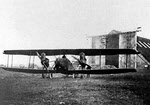 A.E.G. G.II at Fort Cognelee, 1918
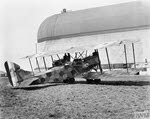 A.E.G. G.IV in front of airship hanger
 Captured A.E.G. G.IV at Saint Omer
 Captured A.E.G. G.IV at Villacoublay
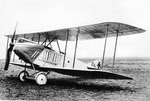
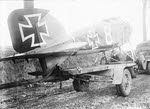
 A.E.G. G.IV from the right, 1918
 A.E.G. J.II of Deutsche Luft Reederei
 A.E.G. J.II from the front, 1918
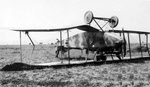
 A.E.G. PE Triplane from the right
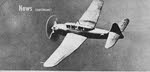
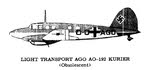 AGO Ao 192 Kurier left side view
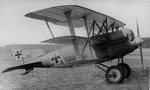
 Ago C.III from the front-left, 1915
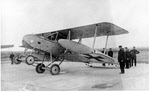
 Ago C.VIII from the front-right
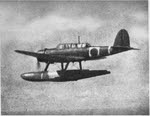
 Aichi B7A Ryusei (Shooting Star) 'Grace' in flight
 Aichi B7A Ryusei (Shooting Star) 'Grace' under cover
 Aichi B7A 'Grace' from the left
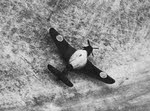
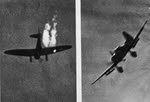
 Aichi D3A shot down over USS Enterprise (CV-6)
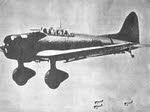 Aichi D3A1 'Val' from the left
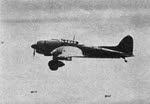 Aichi D3A2 'Val' from the left
 Aichi D3A2 'Val' from the front
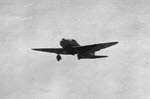
 Two views of Aichi D3A 'Val' in flight
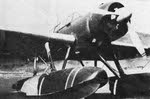 Front view of Aichi E13A 'Jake'
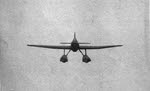 Aichi E13A 'Jake' from the front
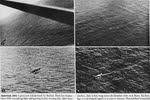 Aichi E13A 'Jake' being shot down
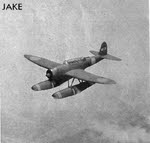 Aichi E13A 'Jake' from above left
 Aichi E13A 'Jake' from the right
 Aichi E13A 'Jake' from the front-right
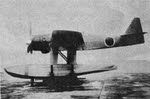
 Aichi E13A 'Jake' from the left
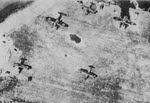 Mitsubishi F1M 'Pete' and Aichi E13A 'Jake' attacked on Truk
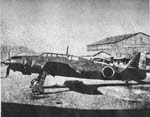
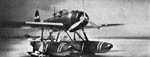
 Aichi E16A 'Paul' from the left
 Aichi E16A 'Paul' from the rear
 Aircrew,
Canadian, in Training
Aircrew,
Canadian, in Training
 Airmen,
Aero Engine training for Australian
Airmen,
Aero Engine training for Australian
 Airspeed Horsa Glider coming in to Land
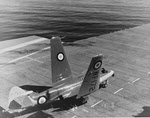
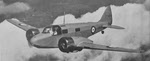 Airspeed Oxford L4576 in flight
 Airspeed Oxford trainer - the cabin
![]() Alabama, cruise of, detail showing Atlantic
Alabama, cruise of, detail showing Atlantic
![]() Alabana, C.S.S., shown sinking
Alabana, C.S.S., shown sinking
![]() Albacore, Fairey, on the carrier deck
Albacore, Fairey, on the carrier deck
![]() Albacore, Fairey, taking off from carrier
Albacore, Fairey, taking off from carrier
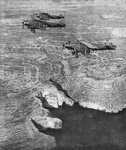 Albacores in the Middle East (1 of 3)
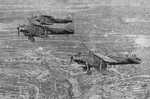 Albacores in the Middle East (2 of 3)
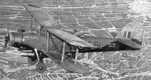 Albacores in the Middle East (3 of 3)
 Shot-down Albatros C.I from the left
 Shot-down Albatros C.I from the front
 Lt Hartmuth Baldamus in Albatros D.II
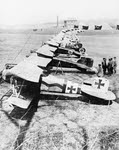 Albatros D.IIIs of Jasta 4 and Jasta 11
 Fuselage of Albatros D.III being towed
 Pilot standing by Albatros D.III
 Fuselage of Albatros D.V being towed
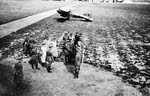 Ludendorff inspects Albatros D.V pilots of Jasta 11
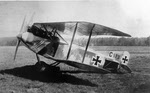
 Captured Albatros D.V from the left
 Captured Albatros D.V from the rear
 First prototype of Albatros W.4
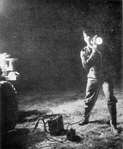 Aldis lamp giving take-off signal
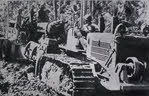
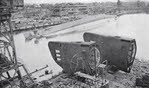
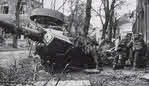 Alpen,
Overturned German Gun at Alpen
Alpen,
Overturned German Gun at Alpen
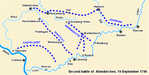 Altenkirchen, second battle of, 19 September 1796
![]() Alma, battle of: Map of the battle
Alma, battle of: Map of the battle
![]() American Colonies before War of Independence
American Colonies before War of Independence
 Ansaldo A.300/4 from the front
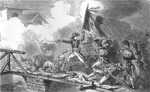
![]() Appomattox Court House: Lee's surrender
Appomattox Court House: Lee's surrender
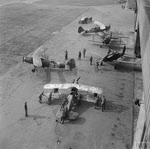 Arado Ar 96 and Gotha Go 145s at Celle, 1945
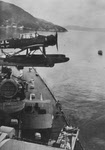 Arado Ar 196 on Gneisenau, 1940
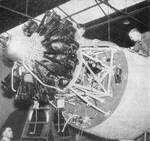
 Arado Ar 234 - nose and engines
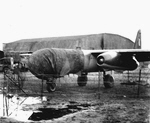 Arado Ar 234 with nose covered
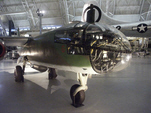 Arado Ar 234 - modern view of nose
 Arcola, Napoleon at the Bridge of, 15 November 1796
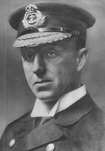 Arbuthnot,
Rear-Admiral Sir Robert K.
Arbuthnot,
Rear-Admiral Sir Robert K.
 Armstrong Siddeley Tiger radial engine
![]() Arizona and New Mexico : Confederate invasion of
Arizona and New Mexico : Confederate invasion of
![]() Arkansas Post, battle of, 10-11 January 1863
Arkansas Post, battle of, 10-11 January 1863
 Armstrong Whitworth Sea Hawk (WF172)
on USS Antietam (CV-36)
Armstrong Whitworth Sea Hawk (WF172)
on USS Antietam (CV-36)
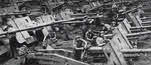
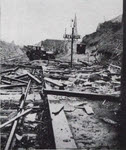 Bypass over railway at Arsbeck, 1945
![]() HMS Argus : converted in 1918
HMS Argus : converted in 1918
![]() Asia Minor : maps showing the main regions in antiquity
Asia Minor : maps showing the main regions in antiquity
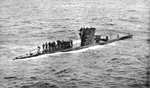 Italian Submarine Asteria surfaced, 17 February 1943
 Italian Submarine Asteria sinking, 17 February 1943
 Australian Troops shelter under aircraft wing
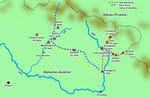 Austro-Prussian War 1866: Battles of Bohemian Front
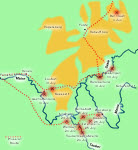 Austro-Prussian War 1866: Battles of German Front
![]() Avenger, HMS : during Operation Torch
Avenger, HMS : during Operation Torch
 2nd Strategic Air Depot
 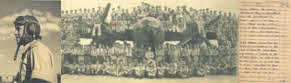 No.12 Squadron SAAF Gallery
 No.51 Squadron
  No.70 Squadron
 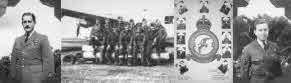 No.86 Squadron
  No.100 Squadron
  No.120 Squadron
  No.129 Squadron
  No.143 Squadron
  No.144 Squadron
  No.208 Squadron, RAF
 No.215 Squadron
  No.256 Squadron, RAF
  No.293 Squadron, RAF
  No.296 Squadron, RAF
  No.322 Squadron, RAF
  No.357 Squadron, RAF
  No.500 Squadron, RAF
 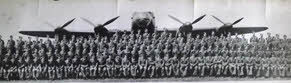 No.576 Squadron, RAF
 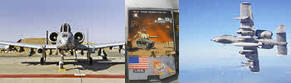 A-10, 'Warthog', Fairchild
 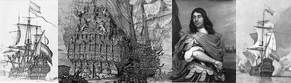 Anglo-Dutch Wars
 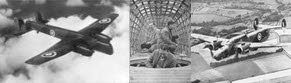 Armstrong Whitworth Gallery
  Avro Gallery
  Avro Lincoln Picture Gallery
  2pdr QF Mk VIII Pom Pom Guns
  4.7in Guns on Destroyer
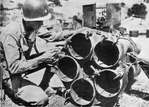
  25-pdr shell casings
  40mm Bofors Gun, Bougainville
 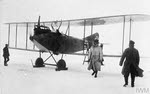 A.E.G. C.IV from the left
 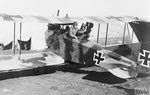 A.E.G. C.IV with cine-camera
 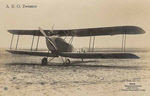 A.E.G. C.IV from the front
 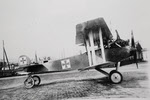 A.E.G. C.IV from the right
 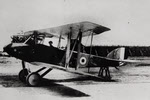 Captured A.E.G. C.IV
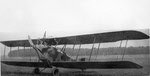 A.E.G. C.IVN from the front
 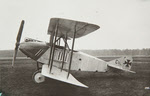 A.E.G. C.V from the left
 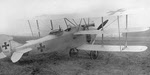 A.E.G. C.VIII Triplane
 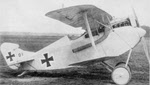 Prototype of A.E.G. D.I
 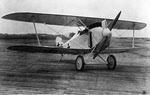 Second design of A.E.G. D.I
 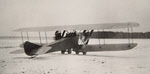 A.E.G. G.I from the rear
 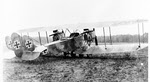 A.E.G. G.II with Triple Tail
 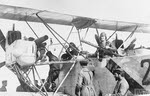 A.E.G. G.III being serviced
 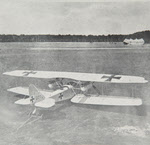 A.E.G. G.III from the rear
 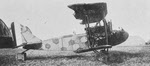 A.E.G. G.IV from the right
 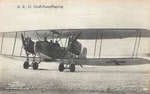 A.E.G. G.IV from the front
 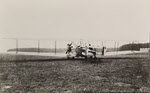 A.E.G. G.V from the rear
 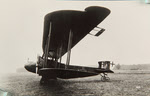 A.E.G. G.V from the left
 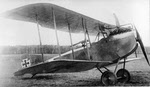 A.E.G. J.I from the right
 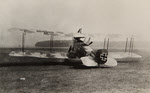 A.E.G. J.I from the rear
 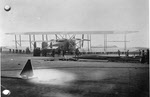 A.E.G. R.I from the rear
 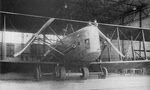 A.E.G. R.I from the front
 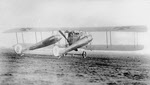 Ago C.I from the rear
 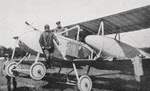 Ago C.I from the left
 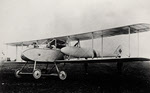 Ago C.II from the front left
 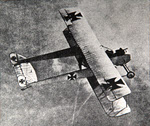 Ago C.II in flight
 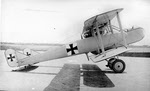 Second version of Ago C.III
 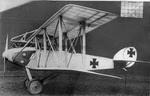 Ago C.VII from the left
 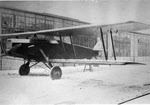 Ago S.I from the left
 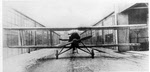 Ago S.I from the front
 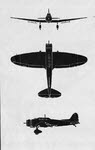 Plans of the Aichi D3A1 'Val'
 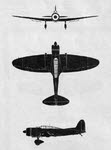 Plans of the Aichi D3A2 'Val'
 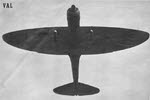 Aichi D3A2 'Val' from below
 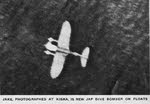 Aichi E13A 'Jake' at Kiska
 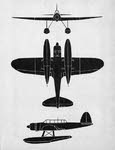 Aichi E13A 'Jake' Plans
 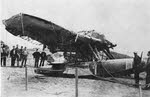 Wrecked Aichi E13A 'Jake'
 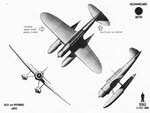 Plans of Aichi E13A 'Jake'
 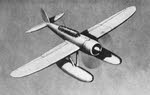 Sketch of Aichi E13A 'Jake'
  Plans of Aichi E16A 'Paul'
 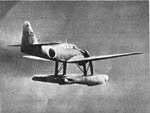 Aichi E16A 'Paul' in flight
 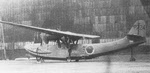 Aichi H9A Flying Boat Trainer
 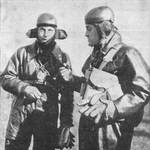 Aircrew, French, 1939
 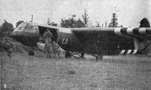 Airspeed Horsa in Normandy
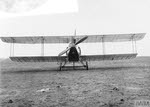 Albatros B.II from the front
 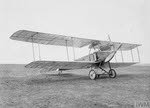 Albatros B.II from the right
 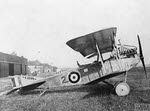 Albatros C.III from the right
  Rear view of Albatros C.V
 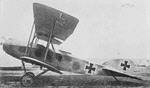 Albatros C.V from the left
 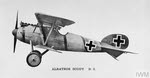 Albatros D.V from the left
 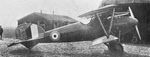 Albatros D.Va from the right
 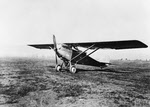 Ansaldo A.115 from the left
 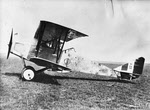 Ansaldo SVA.10 from the left
 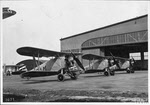 Three Arado Ar 64 fighters
 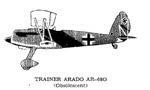 Left view of Arado Ar 68G
 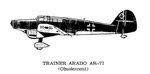 Arado Ar 77 left view
 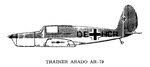 Arado Ar 79 left view
 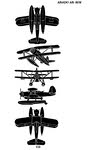 Arado Ar 95W Plans
 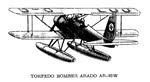 Rear view of Arado Ar 95W
 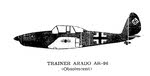 Arado Ar 96 left view
 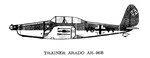 Arado Ar 96B left view
 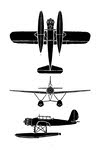 Arado Ar 196 Plans
 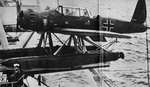 Arado Ar 196 on a Catapult
 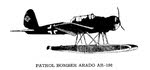 Arado Ar 196 right view
  Arado Ar 197 left plan
  Arado Ar 197 left view
 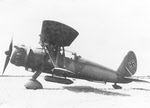 Arado Ar 197 V3 from the left
  Front view of Arado Ar 234C
 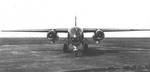 Arado Ar 234 - frontal view
 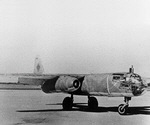 Arado Ar 234 - sideview
 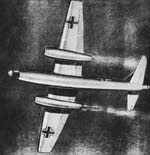 Sketch of Arado Ar 234
 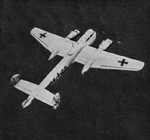 Arado Ar 240 from Above
 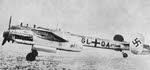 Arado Ar 240 from the left
 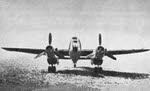 Arado Ar 240 from the front