|
|
|
|
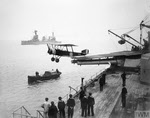
HMS Australia was an Indefatigable class battlecruiser funded by the dominion of Australia to serve as the flagship of the new Royal Australian Navy. She was completed in June 1913, and by the start of the First World War was the flagship of Admiral Patey, the commander of the Australian fleet. At the outbreak of the war, the Australian fleet assembled at Sydney, in preparation for an expedition to New Pommern (New Britain). The intention was to attack Simpson Harbour, and destroy the wireless station at Rabaul.
The Australian government soon expanded this plan into a full-scale invasion of German New Guinea (then ruled from Rabaul). At the same time the New Zealand government decided to send an expedition to Samoa. Admiral Patey was faced with the task of protecting both of these troop convoys against Admiral von Spee’s German East Asian fleet. Most of the early movements of the Australia were influenced by the threat posed by von Spee, while at the same time von Spee made many of his moves to avoid the Australia, which he believed could sink his entire squadron.
The Australia took part in the attacks on Samoa (30-31 August) and Rabaul (11-15 September), both of which ended in success. On 15 September she set sail for Fremantle, where she was to meet the Anzac troop convoy and escort it to Aden, but two days later she was ordered back to Rabaul. Her new role was to prevent von Spee from turning west to join the Emden, then causing havoc in the Indian Ocean. When it was clear that this was not going to happen, the Australiawas sent to Suva, to await orders to cross the Pacific.
They came in early November, after the battle of Coronel. The Australia was moved to southern California to take command of a joint Anglo-Japanese squadron, in case von Spee turned north towards the Panama Canal or Canada. This new squadron then made its way south down the American coast, reaching the Galapagos Islands by 2 December. After the destruction of von Spee’s squadron at the Falklands, the Australia and the Australian elements of her squadron were ordered to proceed through the Panama Canal. The plan was to form a new West Indies Squadron using the Australia, Melbourne and Sydney. This plan had to be abandoned when it was discovered that HMAS Australia was too long to use the locks on the Panama Canal, so while the rest of the squadron passed through into the West Indies, the Australia had to travel the long way, via the Falklands.
She did achieve one success during this journey. A German steamer, the Eleanore Woermann, had been supplying German cruisers. On 6th January, one day after leaving the Falklands, the Australia found the German steamer, sailing as the Anna, and after removing her crew sank her.
The plan for the West Indies was soon abandoned, and the Australia was allocated to the Grand Fleet, reaching Rosyth on 17 February 1915. She served in the 2nd Battle Cruiser Squadron, as the flagship of Rear-Admiral Pakenham. On 28-31 July he led a raid into the Skagerrak. The raid was made by eight light cruisers and twenty destroyers, supported by the 2nd Battle Cruiser Squadron and the 2nd Light Cruiser Squadron. It was hoped to find the German fishing fleet, but only one trawler was found, and the German fleet didn’t respond.
On 22 April 1916 she collided with the New Zealand during a fleet sortie, missing the battle of Jutland. She rejoined the Grand Fleet on 3 June, taking her place with the 2nd Battle Cruiser Squadron on 10 June. She was one of the ships discarded under the terms of the Washington Naval Treaty of 1922, but while most ships were simply broken up, the Australia was scuttled in a ceremony off Sydney on 12 April 1924.
Displacement (loaded) |
22,110t |
Top Speed |
25kts |
Range |
6,330 nautical miles at 10kts |
Armour – deck |
2.5i-1in |
- belt |
6in-4in |
- bulkheads |
4in |
- barbettes |
7in-3in |
- turret faces |
7in |
- conning tower |
10in |
Length |
590ft |
Armaments |
Eight 12in Mk X guns |
Crew complement |
800 |
Launched |
25 October 1911 |
Completed |
June 1913 |
Captains |
S. H. Radcliffe |
Scuttled |
12 April 1924 |
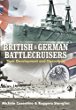 British and German Battlecruisers - Their Development and Operations, Michele Cosentino & Ruggero Stanglini.
A useful volume that covers the development, design and construction of British and German battlecruisers, their wartime deployments and both side's plans for the next generation of battlecruisers, of which only HMS Hood was ever completed. Having all of this material in a single volume gives a much better overview of the two Navy's battlecruisers, their advantages and flaws, and their performance in and out of battle. Concludes with a look at other nation's battlecruisers and battlecruiser designs [read full review]
British and German Battlecruisers - Their Development and Operations, Michele Cosentino & Ruggero Stanglini.
A useful volume that covers the development, design and construction of British and German battlecruisers, their wartime deployments and both side's plans for the next generation of battlecruisers, of which only HMS Hood was ever completed. Having all of this material in a single volume gives a much better overview of the two Navy's battlecruisers, their advantages and flaws, and their performance in and out of battle. Concludes with a look at other nation's battlecruisers and battlecruiser designs [read full review]